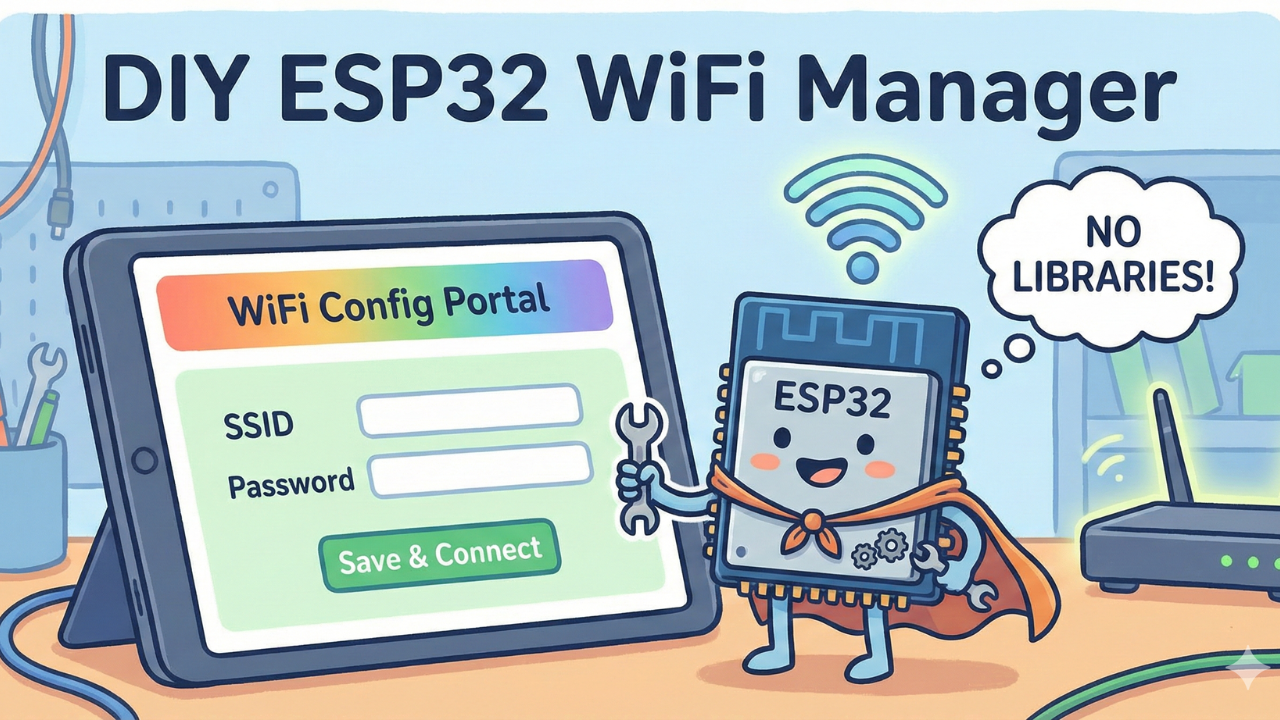
Build a Professional ESP32 WiFi Manager From Scratch (No Libraries Required!)
Tired of heavy libraries and infinite boot loops? Learn to build a professional, lightweight ESP32 WiFi Manager from scratch. This guide covers a custom "Verify-Before-Save" feature that tests credentials before storing them, ensuring your IoT devices are reliable and user-friendly.
Every IoT developer faces the same hurdle: How do you connect your device to a new WiFi network once it’s deployed in the field?
When prototyping on your desk, hardcoding the SSID and Password directly into the code is fine. But when you ship a product, you can't expect end-users to edit code. The standard solution is a "WiFi Manager"—a mode where the ESP32 creates its own hotspot so you can configure it via a phone.

While libraries like WiFiManager exist, they can be heavy and hard to customize. In this project, we are building a Professional, Lightweight WiFi Manager from scratch.
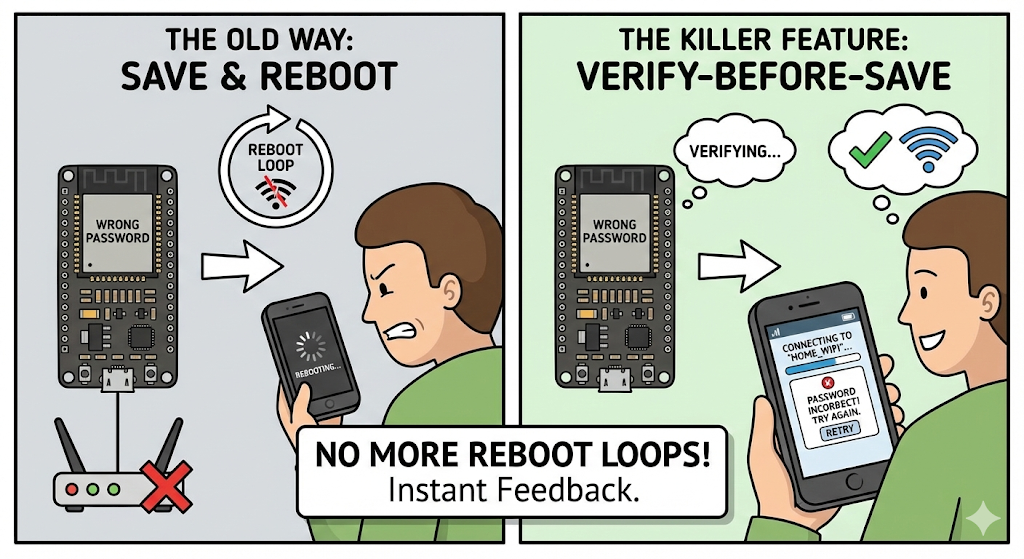
The Killer Feature: unlike standard libraries that save credentials and immediately reboot (hoping they work), our code uses a "Verify-Before-Save" logic. The UI waits while the ESP32 attempts to connect to the new router. If the password is wrong, it tells the user immediately—saving them from a frustrating reboot loop.
📺 Watch the Video Tutorial
If you prefer learning visually, I have recorded a complete step-by-step walkthrough of this project. In the video, I demonstrate the hardware setup, explain the code logic in detail, and show the live bi-directional communication.
Prerequisites (The Setup)
Before we start coding, make sure your environment is ready.
- Arduino IDE & ESP32 Setup: If you are new to the ESP32 or haven't installed the board managers yet, follow my step-by-step guide here: How to Set Up ESP32 in Arduino IDE 2.0 (Windows & Ubuntu Guide).
- Libraries: We use only standard ESP32 libraries (
WiFi.h,WebServer.h,Preferences.h). No external library downloads are required!
Hardware List (The Gear)
- ESP32 Development Board (Any version):
- Push Button: To trigger configuration mode:
- Jumper Wires & Breadboard.
Circuit Diagram & Wiring
The setup is minimal. We use an interrupt-based button to trigger the portal. Note: In the code, we use INPUT_PULLUP, so no external resistor is strictly necessary. The logic detects a FALLING edge (when the button connects to Ground).
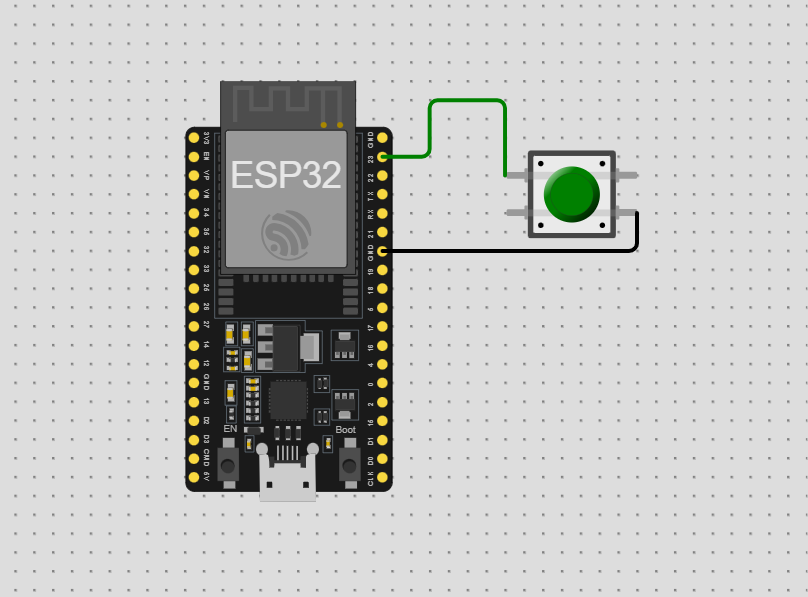
- Step 1: Place the ESP32 on the breadboard.
- Step 2: Insert the push button into the breadboard.
- Step 3: Connect one leg of the button to GPIO 23.
- Step 4: Connect the diagonal or opposite leg of the button to GND.
Note: If your button has 4 legs, legs on the same side are usually connected internally. Use legs across the body from each other to be safe
The Code
To keep our code clean and professional, we are splitting the project into three files. This is standard practice in firmware engineering because it separates the "logic" from the "configuration."
How to Create .h and .cpp Files in Arduino IDE
If you have never used multiple files in the Arduino IDE before, don't worry—it is very simple.
- Open Arduino IDE and start a new sketch.
- Look at the top right corner of the blue bar (below the serial monitor icon). You will see a small down-arrow icon (▼) or three dots (...).
- Click that icon and select "New Tab" (or press
Ctrl+Shift+N). - A box will appear asking for a name. Type
WebPageHandler.hand click OK. - Repeat the process: Click "New Tab" again, name it
WebPageHandler.cpp, and click OK.
You should now see three tabs at the top of your screen:
YourSketchName(The main file)WebPageHandler.hWebPageHandler.cpp
Now, copy and paste the code below into the corresponding tabs.
1. The Header File (WebPageHandler.h)
This file acts as a "blueprint." It tells the compiler what functions and variables we plan to use.
#ifndef WEBPAGE_HANDLER_H
#define WEBPAGE_HANDLER_H

#include <WebServer.h>
#include <Preferences.h>

class WebPageHandler {
public:
  WebPageHandler(WebServer& server);
  void begin();

private:
  WebServer& _server;
  Preferences _prefs;

  // Variables for connection testing
  bool isTestingConnection = false;
  unsigned long testStartTime = 0;

  // HTML Content
  static const char* indexHtml;

  // Handlers
  void handleRoot();
  void handleScan();
  void handleSave();
  void handleGetStatus();
  void handleCheckConnect(); // New: Checks if the new WiFi is working
};

#endif
2. The Logic & HTML (WebPageHandler.cpp)
This file contains the "heavy lifting." It stores the HTML code for our website and handles the saving of data to the ESP32's flash memory.
#include "WebPageHandler.h"
#include <WiFi.h>

WebPageHandler::WebPageHandler(WebServer& server) : _server(server) {}

void WebPageHandler::begin() {
  _prefs.begin("device_prefs", false);
  _server.on("/", HTTP_GET, [this]() { handleRoot(); });
  _server.on("/scan", HTTP_GET, [this]() { handleScan(); });
  _server.on("/save", HTTP_POST, [this]() { handleSave(); });
  _server.on("/status", HTTP_GET, [this]() { handleGetStatus(); });
  _server.on("/check_connect", HTTP_GET, [this]() { handleCheckConnect(); });

  _server.begin();
}

void WebPageHandler::handleRoot() {
  Serial.println("[WEB] Client accessed Root page (/)");
  _server.send(200, "text/html", indexHtml);
}

void WebPageHandler::handleGetStatus() {
  String savedSSID = _prefs.getString("wifi_ssid", "None");
  String json = "{\"ssid\":\"" + savedSSID + "\"}";
  _server.send(200, "application/json", json);
}

void WebPageHandler::handleScan() {
  Serial.println("[WEB] Scan Requested. Scanning networks...");
  int n = WiFi.scanNetworks();
  Serial.print("[WEB] Scan Complete. Found: ");
  Serial.println(n);

  String json = "[";
  for (int i = 0; i < n; ++i) {
    if (i) json += ",";
    json += "{";
    json += "\"ssid\":\"" + WiFi.SSID(i) + "\",";
    json += "\"rssi\":" + String(WiFi.RSSI(i)) + ",";
    json += "\"secure\":" + String(WiFi.encryptionType(i) != WIFI_AUTH_OPEN ? "true" : "false");
    json += "}";
  }
  json += "]";
  _server.send(200, "application/json", json);
}

void WebPageHandler::handleSave() {
  if (_server.hasArg("ssid") && _server.hasArg("pass")) {
    String ssid = _server.arg("ssid");
    String pass = _server.arg("pass");
    String name = _server.arg("name");
    String email = _server.arg("email");

    Serial.println("[WEB] Save Requested.");
    Serial.println("[WEB] SSID: " + ssid);
    Serial.println("[WEB] Pass: ********");
    Serial.println("[WEB] Name: " + name);

    // 1. Temporarily save to RAM variables for testing
    // We don't save to Prefs yet until confirmed (optional, but safer to save so we don't lose it)
    _prefs.putString("wifi_ssid", ssid);
    _prefs.putString("wifi_pass", pass);
    _prefs.putString("device_name", name);
    _prefs.putString("email", email);

    // 2. Switch to Dual Mode (AP + Station)
    // This allows us to keep the user connected to AP while the ESP connects to Router
    Serial.println("[WEB] Switching to AP+STA mode to verify credentials...");
    WiFi.mode(WIFI_AP_STA);
    WiFi.begin(ssid.c_str(), pass.c_str());

    isTestingConnection = true;
    testStartTime = millis();

    _server.send(200, "application/json", "{\"status\":\"testing\"}");
  } else {
    Serial.println("[WEB] Save Error: Missing fields");
    _server.send(400, "application/json", "{\"status\":\"error\", \"message\":\"Missing fields\"}");
  }
}

void WebPageHandler::handleCheckConnect() {
  if (!isTestingConnection) {
    _server.send(200, "application/json", "{\"status\":\"idle\"}");
    return;
  }

  // Check connection status
  if (WiFi.status() == WL_CONNECTED) {
    Serial.println("[WEB] Verification SUCCESS! Connected to router.");
    Serial.print("[WEB] New IP: ");
    Serial.println(WiFi.localIP());

    isTestingConnection = false;
    // Return Success JSON
    _server.send(200, "application/json", "{\"status\":\"connected\", \"ip\":\"" + WiFi.localIP().toString() + "\"}");

    Serial.println("[WEB] Sending Success response and Restarting...");
    delay(500);
    ESP.restart(); // Reboot to go into full Station mode cleanly
  }
  else if (millis() - testStartTime > 15000) { // 15 seconds timeout
    Serial.println("[WEB] Verification FAILED. Timeout/Wrong Password.");
    isTestingConnection = false;
    WiFi.disconnect(); // Stop trying
    // WiFi.mode(WIFI_AP); // Optional: Revert to just AP
    _server.send(200, "application/json", "{\"status\":\"failed\"}");
  }
  else {
    // Still trying
    _server.send(200, "application/json", "{\"status\":\"trying\"}");
  }
}

// --- Frontend Code ---
const char* WebPageHandler::indexHtml = R"rawliteral(
<!DOCTYPE html>
<html lang="en">
<head>
  <meta charset="UTF-8">
  <meta name="viewport" content="width=device-width, initial-scale=1.0, maximum-scale=1.0, user-scalable=no">
  <title>Device Configuration</title>
  <style>
    :root {
      --primary: #6366f1;
      --primary-hover: #4f46e5;
      --bg-gradient: linear-gradient(135deg, #667eea 0%, #764ba2 100%);
      --card-bg: rgba(255, 255, 255, 0.96);
      --text: #1f2937;
      --text-light: #6b7280;
    }

    * { box-sizing: border-box; margin: 0; padding: 0; }

    body {
      font-family: -apple-system, BlinkMacSystemFont, "Segoe UI", Roboto, Helvetica, Arial, sans-serif;
      background: var(--bg-gradient);
      display: flex;
      align-items: center;
      justify-content: center;
      min-height: 100vh;
      padding: 20px;
      color: var(--text);
    }

    .container {
      background: var(--card-bg);
      width: 100%;
      max-width: 400px;
      border-radius: 20px;
      padding: 32px;
      box-shadow: 0 20px 25px -5px rgba(0, 0, 0, 0.1), 0 10px 10px -5px rgba(0, 0, 0, 0.04);
      position: relative;
      backdrop-filter: blur(10px);
    }

    h2 {
      text-align: center;
      color: #333;
      margin-bottom: 24px;
      font-weight: 800;
      font-size: 1.6rem;
      letter-spacing: -0.5px;
    }

    label {
      display: block;
      margin: 16px 0 6px;
      font-weight: 600;
      font-size: 0.9rem;
      color: #4b5563;
    }

    .password-container {
      position: relative;
    }

    .toggle-password {
      position: absolute;
      right: 12px;
      top: 50%;
      transform: translateY(-50%);
      cursor: pointer;
      color: #6b7280;
      font-size: 0.9rem;
      user-select: none;
      background: none;
      border: none;
      padding: 0;
      margin: 0;
    }

    .toggle-password:hover {
      color: var(--primary);
    }

    input {
      width: 100%;
      padding: 12px 16px;
      border: 2px solid #e5e7eb;
      border-radius: 12px;
      font-size: 1rem;
      transition: all 0.3s ease;
      background: #f9fafb;
    }

    input:focus {
      outline: none;
      border-color: var(--primary);
      background: white;
      box-shadow: 0 0 0 4px rgba(99, 102, 241, 0.15);
    }

    button {
      width: 100%;
      padding: 14px;
      border: none;
      border-radius: 12px;
      font-weight: 700;
      font-size: 1rem;
      cursor: pointer;
      margin-top: 24px;
      transition: all 0.2s ease;
      letter-spacing: 0.5px;
    }

    /* Improved Scan Button */
    .btn-scan {
      background: white;
      color: var(--primary);
      border: 2px solid var(--primary);
      margin-top: 10px;
      display: flex;
      align-items: center;
      justify-content: center;
      gap: 10px;
    }

    .btn-scan svg {
      width: 20px;
      height: 20px;
      fill: currentColor;
      transition: transform 0.3s;
    }

    .btn-scan:hover {
      background: #eef2ff;
      transform: translateY(-2px);
      box-shadow: 0 4px 12px rgba(99, 102, 241, 0.1);
    }

    .btn-scan.scanning {
      background: #f3f4f6;
      border-color: #d1d5db;
      color: #6b7280;
      cursor: wait;
    }

    .btn-scan.scanning svg {
      animation: pulse 1s infinite;
    }

    @keyframes pulse {
      0% { opacity: 1; transform: scale(1); }
      50% { opacity: 0.5; transform: scale(0.9); }
      100% { opacity: 1; transform: scale(1); }
    }

    .btn-save {
      background: var(--primary);
      color: white;
      box-shadow: 0 4px 6px -1px rgba(99, 102, 241, 0.3);
      text-transform: uppercase;
    }
    .btn-save:hover {
      background: var(--primary-hover);
      transform: translateY(-2px);
      box-shadow: 0 6px 12px -1px rgba(99, 102, 241, 0.4);
    }
    .btn-save:active { transform: translateY(0); }

    /* WiFi List */
    #wifi-list {
      display: none;
      margin-top: 15px;
      border: 1px solid #e5e7eb;
      border-radius: 12px;
      max-height: 200px;
      overflow-y: auto;
      background: white;
      box-shadow: 0 4px 6px -1px rgba(0,0,0,0.05);
    }
    .wifi-item {
      padding: 12px 16px;
      border-bottom: 1px solid #f3f4f6;
      cursor: pointer;
      display: flex;
      justify-content: space-between;
      align-items: center;
      transition: background 0.2s;
    }
    .wifi-item:hover { background: #eff6ff; }
    .wifi-item:last-child { border-bottom: none; }
    .wifi-item span { font-weight: 600; color: #374151; }
    .wifi-item small { color: #9ca3af; }

    /* Overlay */
    .overlay {
      position: absolute;
      top: 0; left: 0; right: 0; bottom: 0;
      background: rgba(255,255,255,0.98);
      border-radius: 20px;
      display: flex;
      flex-direction: column;
      align-items: center;
      justify-content: center;
      opacity: 0;
      pointer-events: none;
      transition: opacity 0.3s ease;
      z-index: 10;
    }
    .overlay.active { opacity: 1; pointer-events: all; }

    .spinner {
      width: 50px;
      height: 50px;
      border: 5px solid #e5e7eb;
      border-top-color: var(--primary);
      border-radius: 50%;
      animation: spin 1s linear infinite;
      margin-bottom: 24px;
    }
    @keyframes spin { 100% { transform: rotate(360deg); } }

    .msg-box {
      display: flex;
      flex-direction: column;
      align-items: center;
      justify-content: center;
      text-align: center;
      width: 100%;
    }

    .msg-box h3 { margin: 10px 0 5px; color: #111; font-size: 1.25rem; }
    .msg-box p { color: #666; font-size: 1rem; }
    .error-text { color: #ef4444 !important; }
    .success-text { color: #10b981 !important; }

    .icon-large { font-size: 64px; margin-bottom: 16px; display: block; line-height: 1; }
    .icon-success { color: #10b981; }
    .icon-error { color: #ef4444; }

  </style>
</head>
<body>

  <div class="container">
    <!-- Overlay for status -->
    <div id="overlay" class="overlay">
      <div id="loading-ui">
        <div class="spinner"></div>
        <h3>Verifying Connection...</h3>
        <p>Please wait while we test the WiFi.</p>
      </div>

      <div id="success-ui" class="msg-box" style="display:none;">
        <span class="icon-large icon-success">✓</span>
        <h3 class="success-text">Connected!</h3>
        <p>Credentials correct. Rebooting...</p>
      </div>

      <div id="error-ui" class="msg-box" style="display:none;">
        <span class="icon-large icon-error">✕</span>
        <h3 class="error-text">Connection Failed</h3>
        <p>Could not connect. Check password.</p>
        <button onclick="closeOverlay()" style="background:#ef4444; color:white; margin-top:20px;">Try Again</button>
      </div>
    </div>

    <h2>Device Setup</h2>

    <button type="button" class="btn-scan" onclick="scanWifi()">
      <!-- WiFi Icon -->
      <svg viewBox="0 0 24 24"><path d="M12 2C6.48 2 2 6.48 2 12s4.48 10 10 10 10-4.48 10-10S17.52 2 12 2zm-1 17.93c-3.95-.49-7-3.85-7-7.93 0-.62.08-1.21.21-1.79L9 15v1c0 1.1.9 2 2 2v1.93zm6.9-2.54c-.26-.81-1-1.39-1.9-1.39h-1v-3c0-.55-.45-1-1-1H8v-2h2c.55 0 1-.45 1-1V7h2c1.1 0 2-.9 2-2v-.41c2.93 1.19 5 4.06 5 7.41 0 2.08-1.07 3.97-2.74 5.27z"/></svg>
      <span>Scan for Networks</span>
    </button>
    <div id="wifi-list"></div>

    <form id="config-form" onsubmit="handleFormSubmit(event)">
      <label>WiFi SSID</label>
      <input type="text" id="ssid" name="ssid" required placeholder="Select or type SSID">

      <label>WiFi Password</label>
      <div class="password-container">
        <input type="password" id="pass" name="pass" placeholder="Enter WiFi Password">
        <span class="toggle-password" onclick="togglePassword()">Show</span>
      </div>

      <label>Device Name</label>
      <input type="text" name="name" placeholder="e.g. Living Room Lamp">

      <label>Email (Optional)</label>
      <input type="email" name="email" placeholder="admin@example.com">

      <button type="submit" class="btn-save">Save & Connect</button>
    </form>
  </div>

<script>
  function scanWifi() {
    const list = document.getElementById('wifi-list');
    const btn = document.querySelector('.btn-scan');
    const btnText = btn.querySelector('span');

    list.style.display = 'none';
    btnText.innerText = "Scanning...";
    btn.classList.add('scanning');
    btn.disabled = true;

    fetch('/scan').then(res => res.json()).then(data => {
      list.innerHTML = '';
      btnText.innerText = "Scan for Networks";
      btn.classList.remove('scanning');
      btn.disabled = false;

      list.style.display = 'block';
      data.forEach(net => {
        const div = document.createElement('div');
        div.className = 'wifi-item';
        div.innerHTML = `<span>${net.ssid}</span> <small>${net.rssi} dBm</small>`;
        div.onclick = () => { document.getElementById('ssid').value = net.ssid; list.style.display='none'; };
        list.appendChild(div);
      });
    })
    .catch(err => {
      btnText.innerText = "Scan Failed";
      btn.classList.remove('scanning');
      btn.disabled = false;
    });
  }

  function togglePassword() {
    const passInput = document.getElementById('pass');
    const toggleBtn = document.querySelector('.toggle-password');
    if (passInput.type === 'password') {
      passInput.type = 'text';
      toggleBtn.textContent = 'Hide';
    } else {
      passInput.type = 'password';
      toggleBtn.textContent = 'Show';
    }
  }

  function handleFormSubmit(e) {
    e.preventDefault();
    const overlay = document.getElementById('overlay');
    const loading = document.getElementById('loading-ui');
    const success = document.getElementById('success-ui');
    const error = document.getElementById('error-ui');

    // Reset UI
    overlay.classList.add('active');
    loading.style.display = 'block';
    success.style.display = 'none';
    error.style.display = 'none';

    // Submit Form
    const formData = new FormData(document.getElementById('config-form'));
    const params = new URLSearchParams(formData);

    fetch('/save', { method: 'POST', body: params })
      .then(res => res.json())
      .then(data => {
        if(data.status === 'testing') {
          // Start Polling
          pollStatus();
        }
      });
  }

  function pollStatus() {
    // Check every 1 second
    const interval = setInterval(() => {
      fetch('/check_connect')
        .then(res => res.json())
        .then(data => {
          if (data.status === 'connected') {
            clearInterval(interval);
            document.getElementById('loading-ui').style.display = 'none';
            document.getElementById('success-ui').style.display = 'block';
          } else if (data.status === 'failed') {
            clearInterval(interval);
            document.getElementById('loading-ui').style.display = 'none';
            document.getElementById('error-ui').style.display = 'block';
          }
        })
        .catch(err => {
           // If fetch fails (maybe ESP rebooted?), assume success or stop polling
           // clearInterval(interval);
        });
    }, 1000);
  }

  function closeOverlay() {
    document.getElementById('overlay').classList.remove('active');
  }
</script>
</body>
</html>
)rawliteral";
3. The Main Sketch (main.ino)
This file manages the device state. On boot, it checks Preferences (non-volatile memory) for saved credentials.
- If credentials exist: It tries to connect. If the connection fails or times out (15s), it automatically launches the Config Portal.
- If the button is held (3s): It forces the Config Portal to open.
- Interrupts: We use
attachInterrupton Pin 23 to detect button presses immediately, ensuring the device feels responsive.
#include <WiFi.h>
#include <WebServer.h>
#include <Preferences.h>
#include "WebPageHandler.h"

#define BUTTON_PIN 23
#define AP_NAME "ESP32_Device"
#define AP_PASS "12345678"
#define HOLD_TIME 3000         // 3 seconds hold to trigger config
#define WIFI_TIMEOUT 15000     // 15 seconds timeout for connecting to saved WiFi
#define CONFIG_TIMEOUT 180000  // 3 minutes timeout for the portal

Preferences prefs;
WebServer* server = nullptr;
WebPageHandler* pageHandler = nullptr;


volatile bool buttonPressed = false;
unsigned long buttonPressStart = 0;


void IRAM_ATTR handleButtonInterrupt() {
  if (!buttonPressed && digitalRead(BUTTON_PIN) == LOW) {
    buttonPressed = true;
    buttonPressStart = millis();
  }
}

void runConfigPortal() {
  Serial.println("\n[PORTAL] --------------------------------");
  Serial.println("[PORTAL] Starting Configuration Mode");
  WiFi.disconnect();
  delay(100);
  WiFi.mode(WIFI_AP);
  Serial.println("[PORTAL] WiFi Mode: Access Point (AP)");

  IPAddress local_IP(192, 168, 0, 1);
  IPAddress gateway(192, 168, 0, 1);
  IPAddress subnet(255, 255, 255, 0);
  WiFi.softAPConfig(local_IP, gateway, subnet);
  WiFi.softAP(AP_NAME, AP_PASS);
  Serial.print("[PORTAL] AP Created: ");
  Serial.println(AP_NAME);
  Serial.print("[PORTAL] AP IP Address: ");
  Serial.println(WiFi.softAPIP());

  if (server) delete server;
  server = new WebServer(80);
  if (pageHandler) delete pageHandler;
  pageHandler = new WebPageHandler(*server);
  pageHandler->begin();
  Serial.println("[PORTAL] Web Server Started");

  unsigned long startTime = millis();
  Serial.println("[PORTAL] Waiting for clients to connect...");
  while (millis() - startTime < CONFIG_TIMEOUT) {
    server->handleClient();
    delay(2);
    if ((millis() - startTime) % 10000 < 5) {
    }
  }
  Serial.println("\n[PORTAL] Timeout reached (3 mins). Restarting device...");
  ESP.restart();
}

void setup() {
  Serial.begin(115200);
  pinMode(BUTTON_PIN, INPUT_PULLUP);
  attachInterrupt(digitalPinToInterrupt(BUTTON_PIN), handleButtonInterrupt, FALLING);
  Serial.println("\n\n[BOOT] System Starting...");
  prefs.begin("device_prefs", true);  // Read-only
  String ssid = prefs.getString("wifi_ssid", "");
  String pass = prefs.getString("wifi_pass", "");
  String name = prefs.getString("device_name", "N/A");
  String email = prefs.getString("email", "N/A");
  prefs.end();

  Serial.println("[BOOT] Preferences Loaded");
  Serial.println("--------------------------------");
  Serial.println("   ESP32 BOOT INFO SYSTEM       ");
  Serial.println("--------------------------------");
  Serial.println("Device Name : " + name);
  Serial.println("Saved SSID  : " + (ssid == "" ? "No SSID Saved" : ssid));
  Serial.println("Saved Pass  : " + String(pass == "" ? "No Pass Saved" : "********"));
  Serial.println("--------------------------------");

  if (ssid != "") {
    Serial.print("[WIFI] Connecting to: ");
    Serial.println(ssid);
    WiFi.mode(WIFI_STA);
    WiFi.begin(ssid.c_str(), pass.c_str());
    unsigned long startAttempt = millis();
    bool connected = false;
    while (millis() - startAttempt < WIFI_TIMEOUT) {
      if (WiFi.status() == WL_CONNECTED) {
        connected = true;
        break;
      }
      delay(500);
      Serial.print(".");
      if (buttonPressed && (millis() - buttonPressStart >= HOLD_TIME)) {
        buttonPressed = false;
        Serial.println("\n[INPUT] Button Interrupt during boot -> Launching Portal");
        runConfigPortal();
        return;
      }
    }

    Serial.println();
    if (connected) {
      Serial.println("[WIFI] Success! Connected.");
      Serial.print("[WIFI] IP Address: ");
      Serial.println(WiFi.localIP());
    } else {
      Serial.println("[WIFI] Connection Failed (Timeout/Wrong Password).");
      Serial.println("[WIFI] Launching Config Portal...");
      runConfigPortal();
    }
  } else {
    Serial.println("[BOOT] No Credentials found. Launching Config Portal...");
    runConfigPortal();
  }
}

void loop() {
  if (buttonPressed) {
    if (digitalRead(BUTTON_PIN) == LOW) {
      unsigned long holdDuration = millis() - buttonPressStart;
      static unsigned long lastPrint = 0;
      if (holdDuration > 1000 && millis() - lastPrint > 1000) {
        Serial.print("[INPUT] Holding button... ");
        Serial.print(holdDuration / 1000);
        Serial.println("s");
        lastPrint = millis();
      }

      if (holdDuration >= HOLD_TIME) {
        Serial.println("[INPUT] Hold time reached -> Starting Config Portal");
        buttonPressed = false;
        runConfigPortal();  // This will now block until timeout or restart
      }
    } else {
      if (millis() - buttonPressStart > 100) {  // filter noise
        Serial.println("[INPUT] Button released early.");
      }
      buttonPressed = false;
    }
  }
}
Watch the Demo
Check out this clip showing exactly what happens after the upload is complete, including the unique "Verification" feature:
How to Use It
Once you have uploaded the code to your ESP32, here is the exact workflow:
- First Boot: Since no WiFi is saved yet, the ESP32 will automatically start in Access Point Mode.
- Connect to AP: On your smartphone or laptop, search for a WiFi network named
ESP32_Device. Connect to it using the password:12345678. - Open the Portal: Open your web browser and navigate to
192.168.0.1. You will see the custom configuration page. - Scan & Save:
- Click "Scan for Networks" to see available WiFi signals.
- Select your home/office WiFi.
- Enter the password and click "Save & Connect".
- Watch the Verification: The overlay will appear saying "Verifying Connection...".
- If Success: You'll see a green checkmark, and the ESP32 will reboot and connect to your internet automatically.
- If Failed: You'll see a red cross. Just close the overlay and fix the password—no need to restart the device!
- Re-Entering Config Mode: If you ever need to change the WiFi later, simply press and hold the button (GPIO 23) for 3 seconds until the Serial Monitor says "Starting Config Portal".
Conclusion: Taking Control of Your IoT Devices
Congratulations! You have just replaced a heavy, "black box" library with a lean, professional, and robust solution that you fully understand.
By building this WiFi Manager from scratch, you’ve gained three massive advantages:
- Reliability: The "Verify-Before-Save" feature is a game-changer for deployed devices. It stops the infinite reboot loop caused by simple password typos, saving you (and your customers) a lot of headaches.
- Performance: You aren't dragging in thousands of lines of unused library code. Your firmware remains lightweight and fast.
- Extensibility: This is just the beginning. Since you own the HTML and the parsing logic, you can easily add more fields. Need to let the user configure an MQTT Broker IP, an API Key, or a Device ID? You can simply add another input field to the HTML and handle it in the
savefunction.
You are no longer dependent on a library maintainer to fix bugs or add features. You are in control.
If you found this guide helpful, be sure to subscribe to the IoT Bhai YouTube Channel for more industrial-grade IoT tutorials, including upcoming guides on GSM modules and OTA updates!
Happy Coding!