Upgrade Your ESP32 Firmware Remotely (OTA) Using GitHub
Learn how to perform true over‑the‑air (OTA) updates on ESP32‑based IoT devices anywhere in the world using a public GitHub repository as a free, reliable firmware server.
Introduction: The Real OTA Problem in IoT
If you’ve ever deployed an ESP32 project in the real world, you already know the pain.
You finish the prototype. You solder everything cleanly. You mount the device on a wall, inside a control box, on a pole, in an attic, or maybe somewhere outdoors. Then a few days later… you notice a bug. Or worse, a missing feature.
Now comes the nightmare scenario:
- Physical access is difficult or expensive
- The device is installed far from your desk
- USB flashing means downtime and manual labor
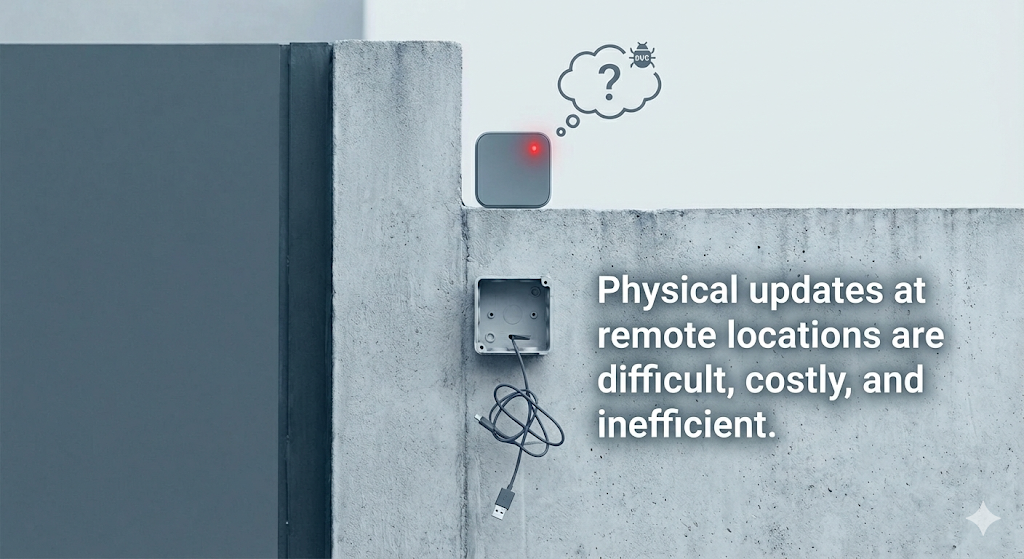
This is not scalable IoT.
That’s why OTA (Over‑the‑Air) firmware updates are not a luxury — they’re a requirement.
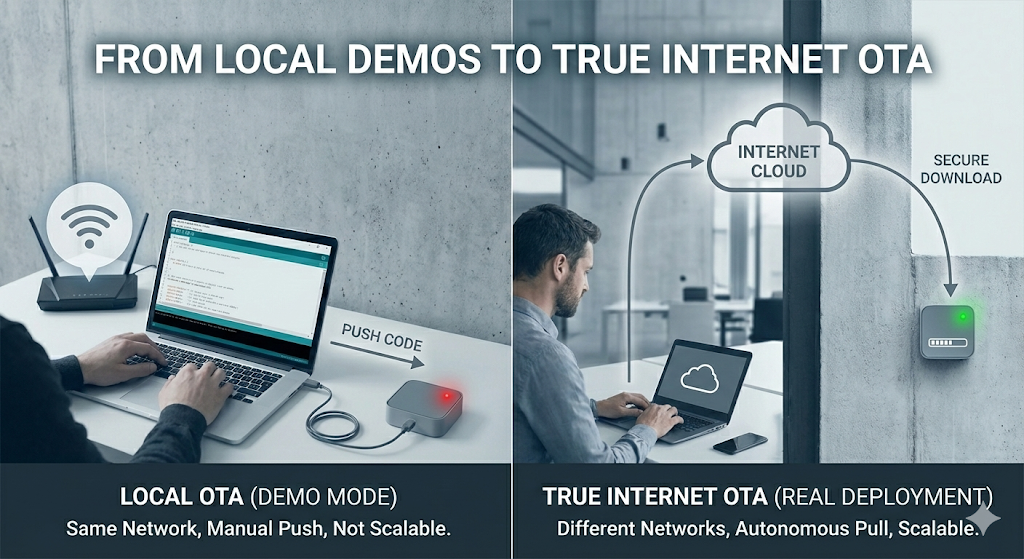
Many tutorials stop at local OTA (same WiFi network, Arduino IDE pushing code). That’s fine for demos, but it completely breaks down in real deployments.
What real IoT systems need is True Internet OTA:
- Device and developer on different networks
- No port forwarding
- No local discovery
- Fully autonomous update logic
In this guide — based on my recent YouTube tutorial — we’ll build a production‑style OTA system where:
- The ESP32 checks GitHub for new firmware
- Compares versions safely
- Downloads the update automatically
- Installs and reboots without user interaction
And best of all — GitHub is used as a free, highly reliable OTA server.
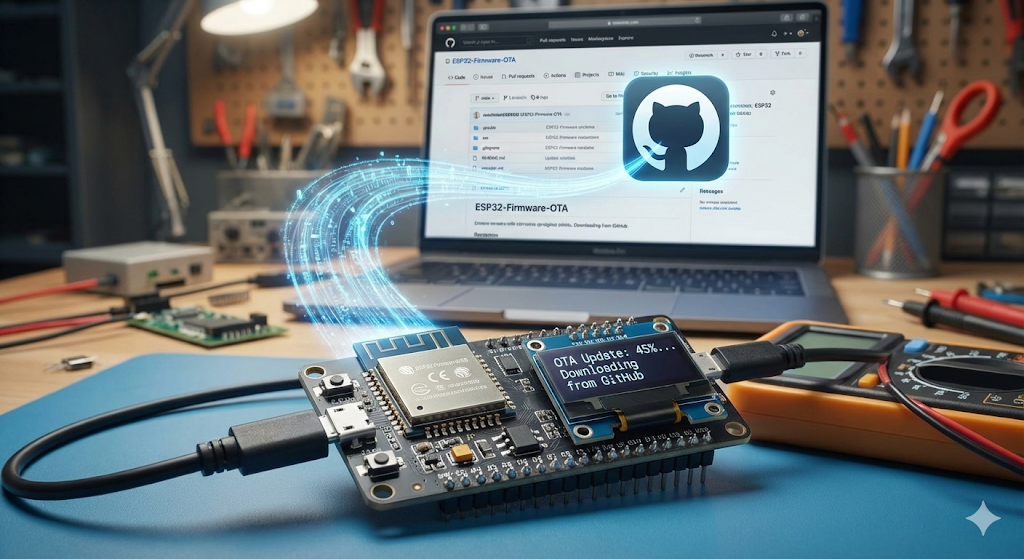
Why Use GitHub for ESP32 OTA?
There are many OTA approaches available today:
- AWS IoT
- Azure IoT Hub
- Firebase hosting
- Blynk OTA
- Self‑hosted servers
So why GitHub?
1. Completely Free
Public GitHub repositories cost nothing. No servers, no monthly bills, no bandwidth planning for small‑to‑medium projects.
2. Extremely Reliable
GitHub runs on infrastructure backed by Microsoft. Uptime, CDN performance, and global availability are excellent.
3. Perfect for Versioned Firmware
GitHub releases are designed for binary distribution:
- Version tags
- Changelogs
- Rollback support
- Clean URLs
4. True Internet OTA
Your ESP32 only needs:
- WiFi access
- Internet connectivity
It does not need to be on the same LAN as your computer.
This mirrors how commercial IoT devices work in the real world.
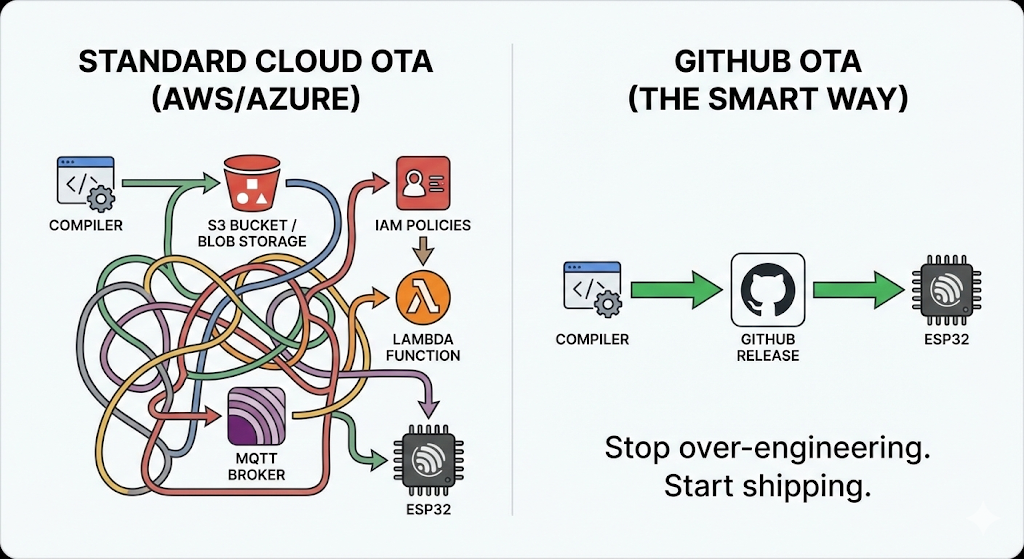
The Comparison
| Feature | AWS / Azure | Self-Hosted / DIY | GitHub (Our Method) |
| Cost | Free tier (tricky limits) | $5–$20/mo (VPS) | Free (Public Repos) |
| Setup Time | Hours (Certs, Policies) | Hours (Linux config) | Minutes |
| Maintenance | High (Policy management) | High (Security updates) | Zero |
| Workflow | Manual Uploads | Manual FTP/SCP | Git Push & Tag |
High‑Level OTA Architecture
Before touching any code, let’s understand the system logic.
On every boot (or scheduled interval), the ESP32 follows this sequence:
- Connect to WiFi
Internet access is mandatory. - Check Firmware Version
Download a smallversion.txtfile from GitHub. - Compare Versions
Compare cloud version vs currently running firmware. - Decision Logic
- Same version → Continue normal operation
- Newer version → Start OTA update
- Download Firmware Binary (.bin)
- Flash Firmware to OTA Partition
- Verify & Restart
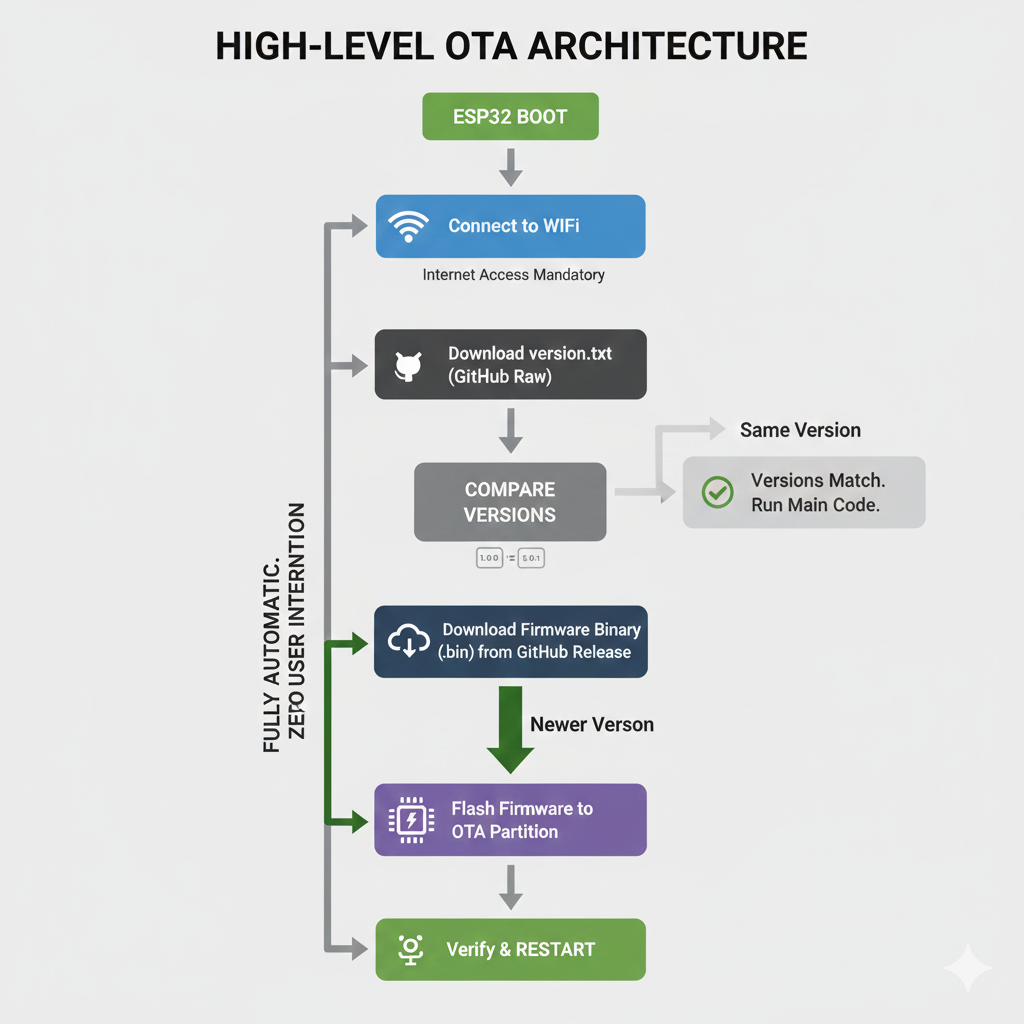
This process is fully automatic and requires zero manual intervention once deployed.
Watch the Video Tutorial
If you prefer learning visually, I have put together a complete step-by-step video walkthrough of this project.
Hardware Required
- ESP32 Development Board
Software Tools
- Arduino IDE: Make sure you have the latest version installed.
- ESP32 Board Support: You must have the ESP32 board manager installed in your IDE. Need help? Check out my guide: How to Set Up ESP32 in Arduino IDE 2.0 (Windows/Ubuntu)
Phase 1: GitHub Repository Setup (Critical Step)
Most OTA failures happen here. Pay attention.
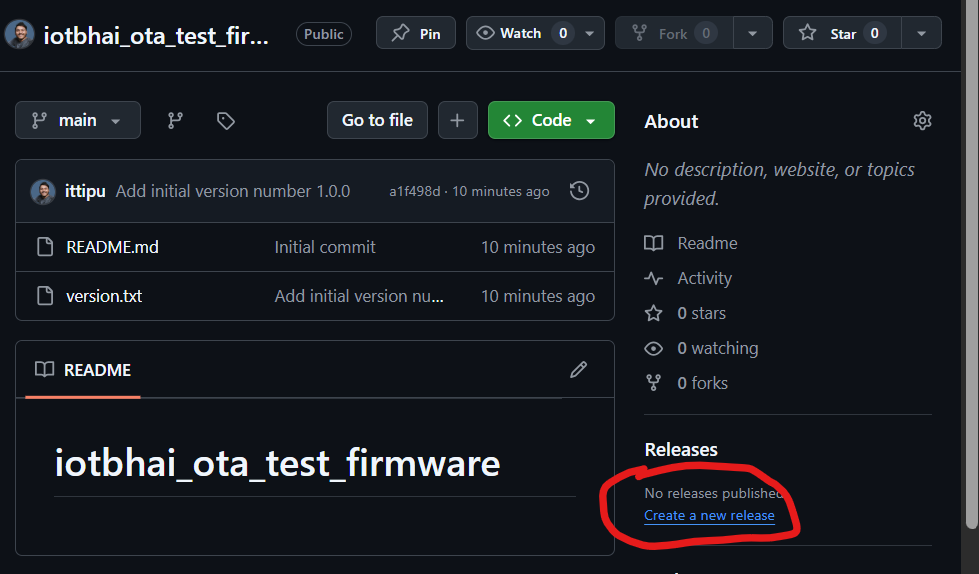
Step 1: Create a Public Repository
- Go to GitHub → New Repository
- Name it something meaningful, for example:ESP32-OTA-Firmware
- Set Visibility: Public
- Initialize with a
README.md
⚠️ Private repositories require authentication tokens and HTTPS headers — that’s an advanced topic and outside the scope of this guide. [ Video Already in My Youtube channel)
Step 2: Create the Version File
Inside the repository:
- Create a new file named:
version.txt- Add only the version number inside:
1.0.0- Commit the file
Keep this file clean:
- No spaces
- No extra lines
- No comments
The ESP32 will parse this file directly.
Step 3: Get the Raw File URL (Most Common Mistake)
The ESP32 cannot read GitHub webpages. It needs raw file content.
- Open
version.txtin GitHub - Click the Raw button
- You should see a blank page with only:
1.0.0- Copy the URL from the address bar
It must look like:
https://raw.githubusercontent.com/USERNAME/REPO/main/version.txtSave this carefully — this is your VERSION_FILE_URL.
Phase 2: ESP32 Firmware Configuration (Arduino IDE)
Download the code first
Github

Now we configure the ESP32 side.
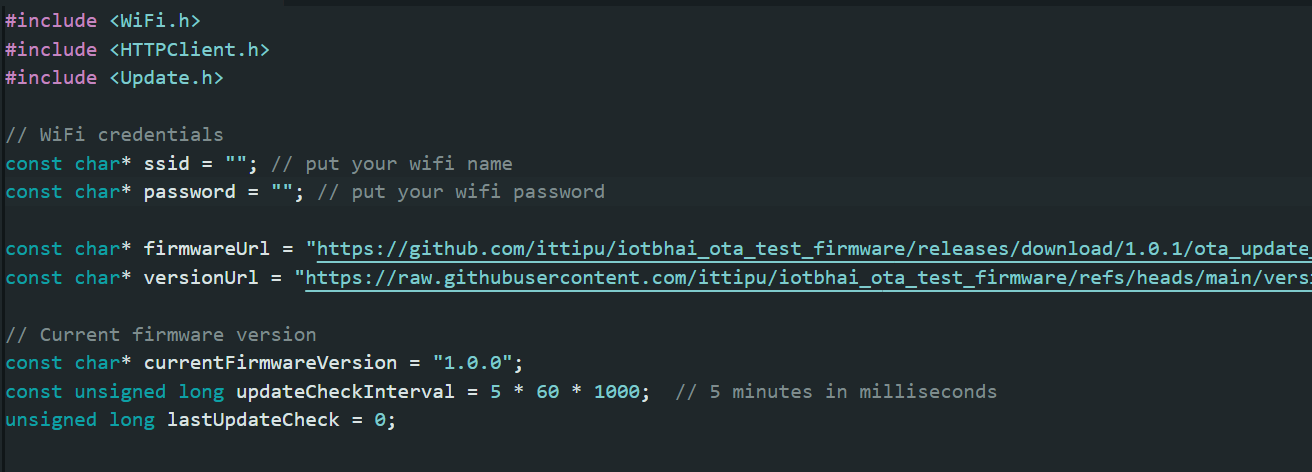
1. WiFi Credentials
Your device must reach the internet:
const char* ssid = "YOUR_WIFI_SSID";
const char* password = "YOUR_WIFI_PASSWORD";
2. The Current Internal Version
You need a variable in your code that tells the ESP32 what version it is currently running. Let's start it at 1.0.0 to match our text file.
String FirmwareVer = "1.0.0";3. The GitHub URLs
Paste the "Raw" link you copied in Phase 1 into the version URL variable.
You also need to define where the .bin file will eventually live. Even though we haven't uploaded the binary yet, we know the structure of GitHub release URLs.
- Version URL: The raw link to
version.txt. - Firmware URL: The link to where your release binary will be. It usually looks like:
https://github.com/<username>/<repo>/releases/download/<tag>/<filename.bin>
// URL to the raw text file containing the latest version number
const char* versionUrl= "https://raw.githubusercontent.com/YOUR_USERNAME/YOUR_REPO_NAME/main/version.txt";

// URL to the actual firmware binary file in releases
const char* firmwareUrl = "https://github.com/YOUR_USERNAME/YOUR_REPO_NAME/releases/download/v1.0.1/firmware.bin";
(Note: We will use tag v1.0.1 for the update test, so put that in the code now).
Phase 3: OTA Deployment Workflow (Real‑World Process)
Current State:
- GitHub
version.txtsays1.0.0. - Your ESP32 code variable
FirmwareVersays1.0.0.
Result: No update triggered ✔️
Step 1: Prepare New Firmware (v1.0.1)
Update your code:
const char* currentFirmwareVersion = "1.0.1";Step 2: Export Binary File
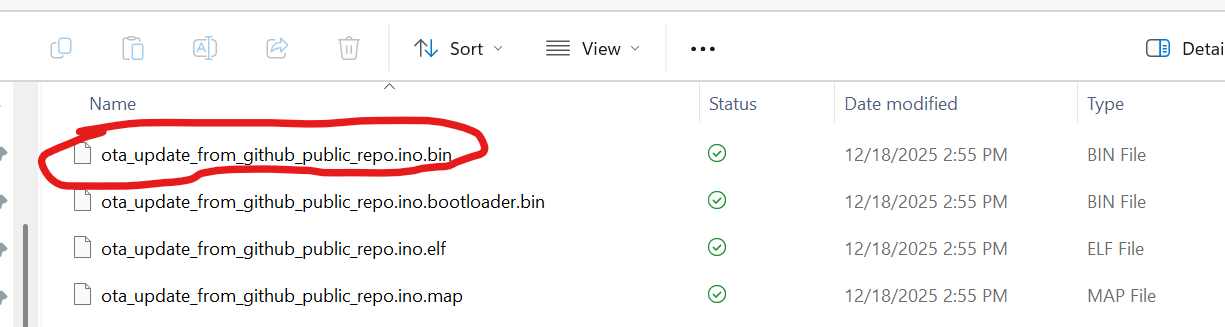
In Arduino IDE:
Sketch → Export Compiled Binaryhis will compile the code and save a .bin file in the same folder where your sketch (.ino) file is saved.

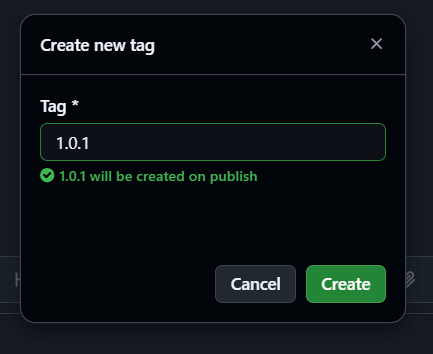
Step 3: Create a GitHub Release
- Go back to your GitHub repository main page.
- On the right side, click "Releases", then "Draft a new release".
- Tag version: Name it
v1.0.1(This must match the tag used in yourfirmwareUrlin the code!).

- Release title: e.g., "Firmware v1.0.1 Update".
- Attach binaries: Drag and drop the
.binfile you generated in Step 2 into this area.
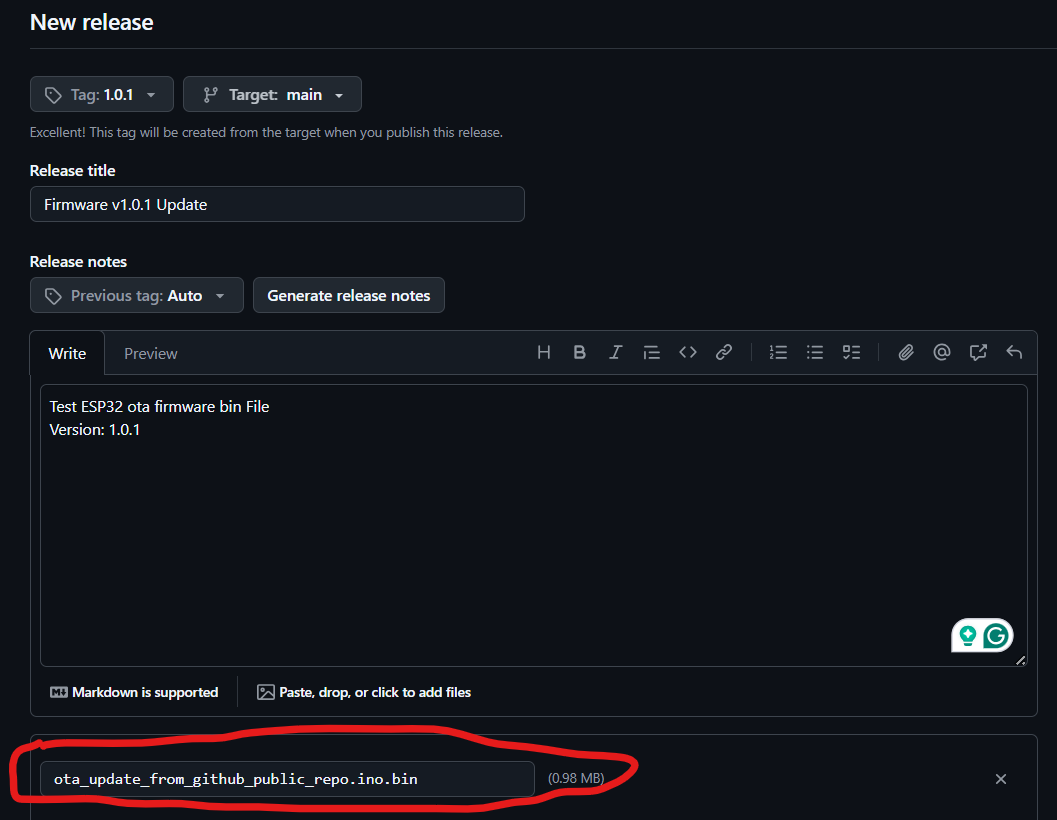
- Click Publish release.
Step 4: Update the Version Check File
The final trigger is updating the text file.
- Go back to your repo code view.
- Edit
version.txt. - Change
1.0.0to1.0.1. - Commit changes.
Phase 4: The Moment of Truth
- Plug your ESP32 into your computer.
- Upload the code with version 1.0.0 because we will update it 1.0.1 with ota
- Open the Serial Monitor (115200 baud).
- Reset the ESP32.
See the Serial monitor
You will see the ESP32 connect to WiFi. It will then check the raw GitHub URL. It will see that the online version (1.0.1) is different than its current version (which is likely still 1.0.0 if you haven't uploaded the new code manually yet).
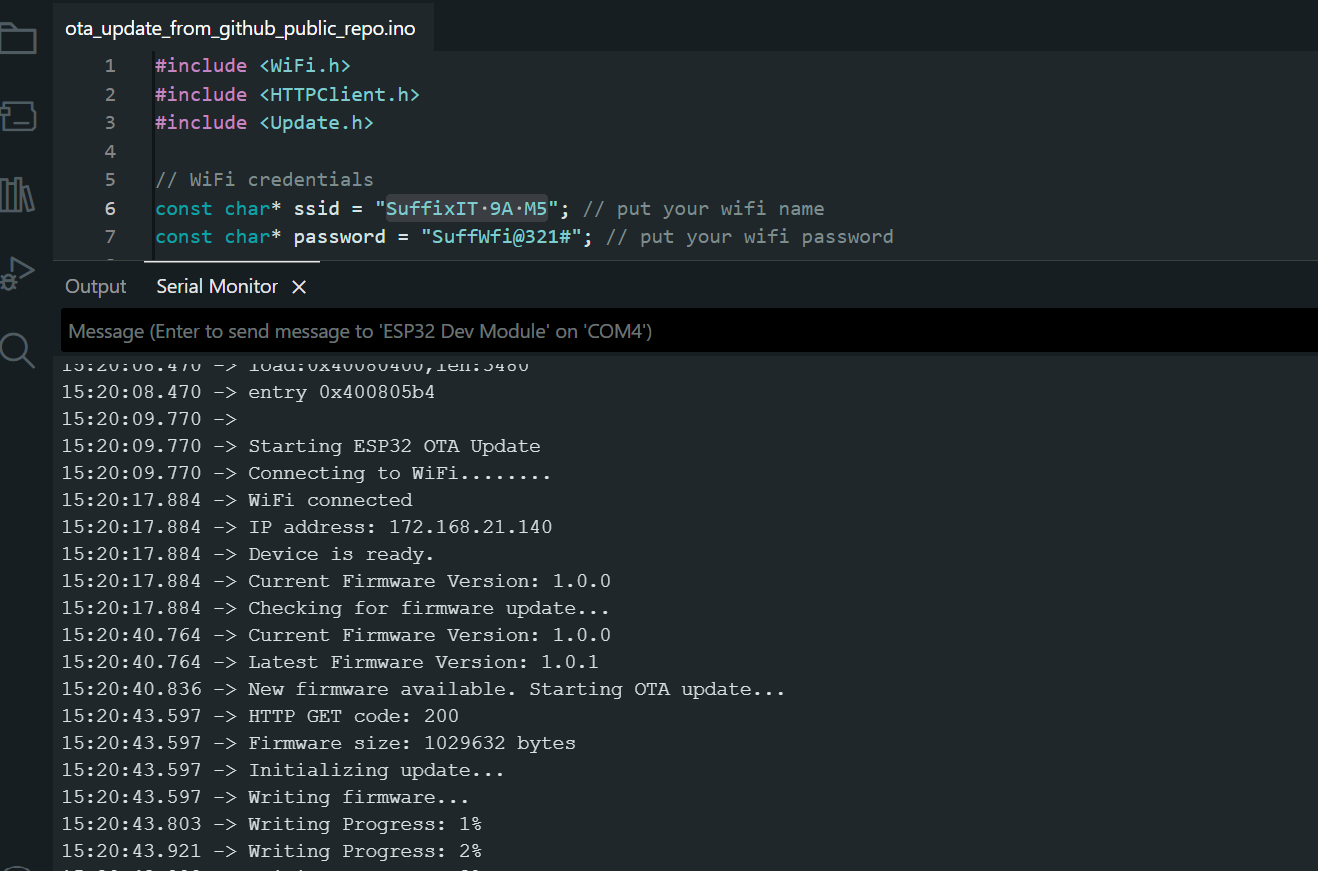
It will begin downloading the binary from the release URL. Once complete, it will restart, and you should see your new startup message confirming that Version 1.0.1 is running.


Conclusion
You have now successfully unlocked the power of remote updates for your ESP32 projects using entirely free tools. This method is highly scalable for hobbyist projects and ensures you never have to climb a ladder to fix a bug again.
For a visual walkthrough of every step, be sure to watch the full video tutorial above!
Watch Full Video
Happy deploying 🚀