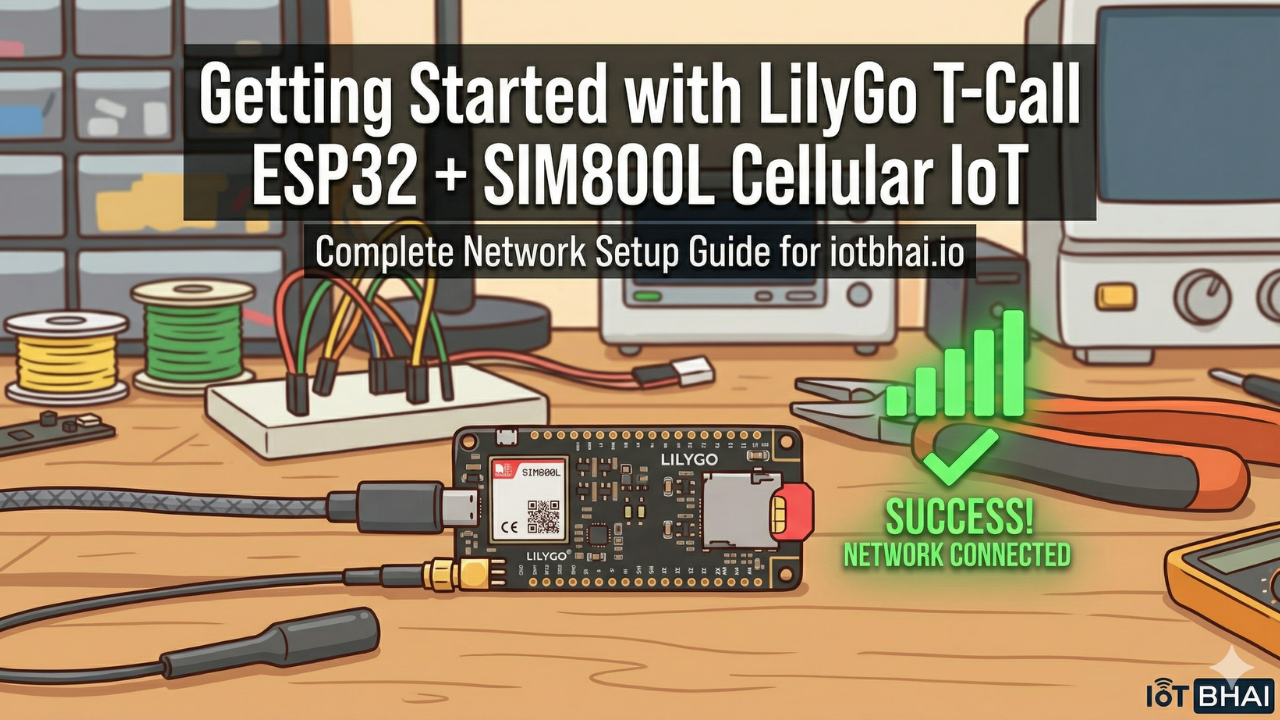
Getting Started with LilyGo T-Call ESP32 SIM800L
Struggling with standalone SIM800L power issues? Discover how the LilyGo T-Call ESP32 solves cellular IoT hardware headaches. In this step-by-step tutorial, learn how to wire, code, and successfully connect your board to a cellular network using the TinyGSM library.
Introduction
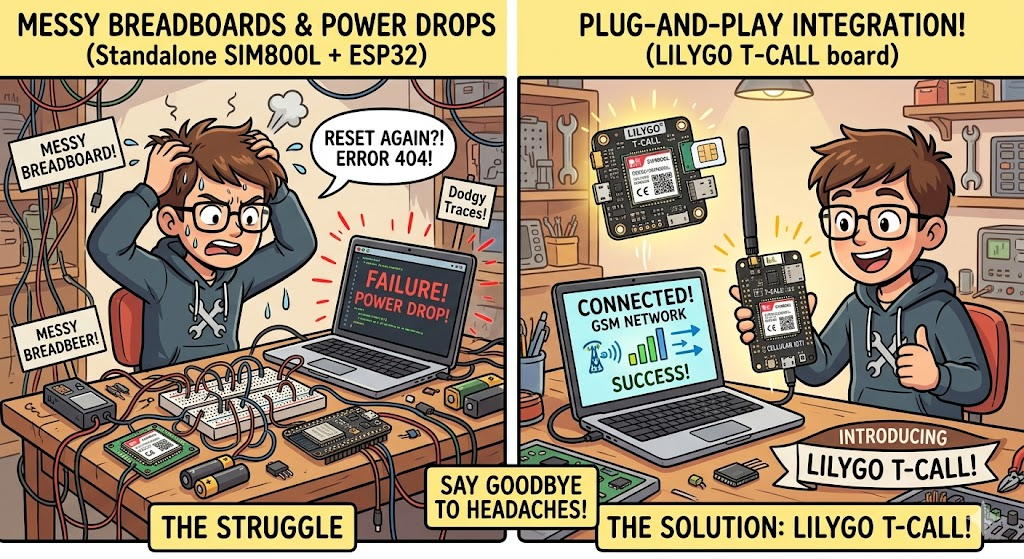
If you have spent any time trying to interface standalone SIM800L GSM modules with the ESP32, you know the struggle is real. We have all been there: messy breadboards, frustrating power drops that cause the modem to reset constantly, and trying to decipher if a connectivity failure is due to code or dodgy hardware traces. The standalone SIM800L is notoriously "painful" due to its strict 4V power requirement and high current consumption during network handshakes.
But what if you could eliminate all those headaches in one go?
In this tutorial, we introduce the LilyGo T-Call ESP32 SIM800L integrated development board. This board is a game-changer for makers building cellular IoT projects. It combines the powerful ESP32 microcontroller with the reliable SIM800L GSM/GPRS modem on a single PCB, solving all those power and wiring issues internally. It is truly a plug-and-play solution.
Let’s get your first cellular network connection up and running effortlessly.
📺 Watch the Video Tutorial
Prefer watching over reading? No problem! I’ve put together a complete, step-by-step video tutorial on the IoT Bhai YouTube channel. You can watch the full experiment and network setup right here:
Why Choose LilyGo T-Call Over Standalone Modules?
The main reason standalone SIM800L modules fail is insufficient power. They require a peak current of nearly 2A at ~4V. A standard Arduino or ESP32 dev board cannot supply this reliably.
The LilyGo T-Call solves this by integrating optimized power management circuitry right onto the board.
Key Features:
- ESP32 Power: Built-in Wi-Fi and Bluetooth.
- SIM800L Cellular: Quad-band GSM/GPRS coverage.
- Plug-and-Play Power: Solves all power headaches internally via USB-C or an attached battery. No external buck converters required.
- Onboard Battery Support: Features an 18650 battery holder (depending on version) and integrated charging circuitry. Connect a 3.7V battery, and the board handles the rest, even charging the battery when USB is connected.
- Compact Design: Perfect for space-constrained tracking devices or remote monitoring systems.
🛒 Prerequisites: What You Need
To follow along with this tutorial and build your own cellular IoT projects, you will need the board and a few basic accessories.
- LilyGo T-Call ESP32 SIM800L Board:
- 3.7V 18650 LiPo Battery (For standalone power):
- High-Quality USB-C Cable (For programming/charging):
- Prepaid IoT Nano SIM Card:
- Arduino IDE is installed on your computer.
Software Tools
- Arduino IDE: Make sure you have the latest version installed.
- ESP32 Board Support: You must have the ESP32 board manager installed in your IDE. Need help? Check out my guide: How to Set Up ESP32 in Arduino IDE 2.0 (Windows/Ubuntu)
What's In The Box
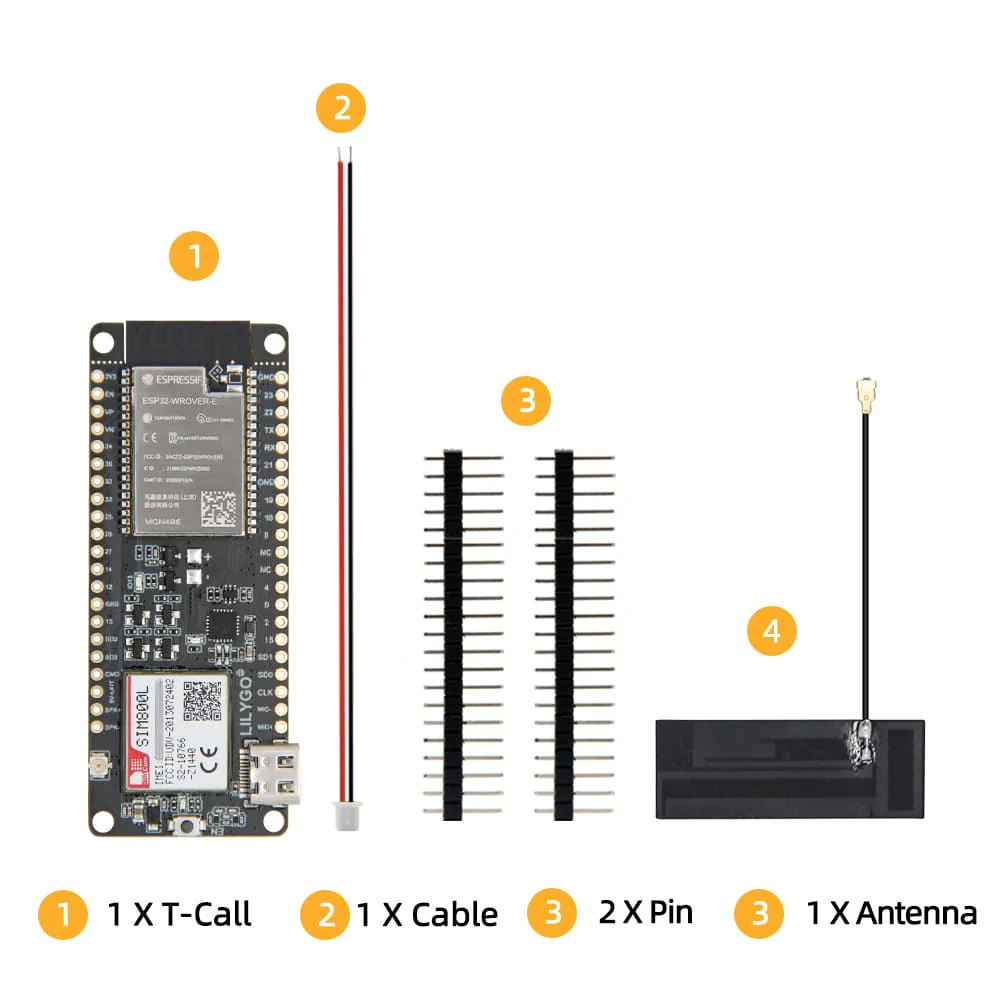
Step 1: Hardware Assembly
Assembly is simple and requires no soldering for this initial setup.
1. Insert the Nano SIM Card: Carefully slide your Nano SIM card into the SIM slot on the bottom of the board. Note the orientation indicated on the slot.

2. Attach the Antenna: Connect the small antenna to the tiny SMA connector on the board. A strong antenna connection is crucial for successful network registration.
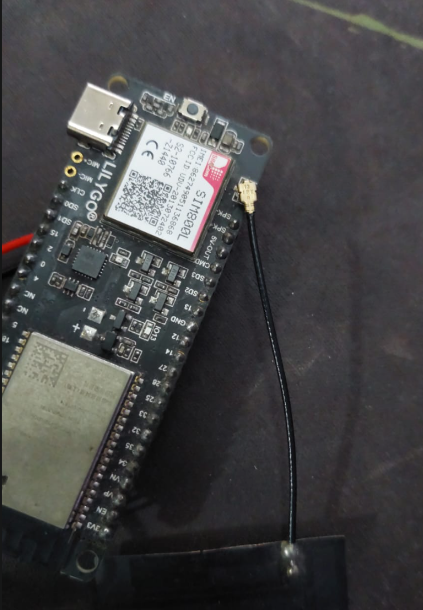
3. Connect Power: Plug the USB Type-C cable into the board and your computer. You don't need external power supplies for this initial test; it's optional for testing cause USB connection will provide sufficient power to the optimized internal circuitry. But in production battery will also be needed also battery can also be needed if you are using a bad USB cable.
Step 2: Preparing the Software (TinyGSM Library)
To interact with the SIM800L modem efficiently, we will use the excellent TinyGSM library.
1. Install TinyGSM Library:
- Open Arduino IDE.
- Go to Sketch -> Include Library -> Manage Libraries...
- Search for "TinyGSM" and install the version by Volodymyr Shymanskyy.

Step 3: The Code Walkthrough
To get the most out of this board, we are going to use a robust script that goes beyond the basics. This code executes the specific power-on sequence required by the LilyGo T-Call hardware, initializes the modem, fetches your SIM card details, connects to the cellular network, and continuously monitors your signal strength.
You can download the full sample code from our GitHub repository.
#define TINY_GSM_MODEM_SIM800
#define SerialMon Serial
#define SerialAT Serial1
#define TINY_GSM_DEBUG SerialMon
#define GSM_PIN ""
#include <TinyGsmClient.h>
#ifdef DUMP_AT_COMMANDS
#include <StreamDebugger.h>
StreamDebugger debugger(SerialAT, SerialMon);
TinyGsm modem(debugger);
#else
TinyGsm modem(SerialAT);
#endif
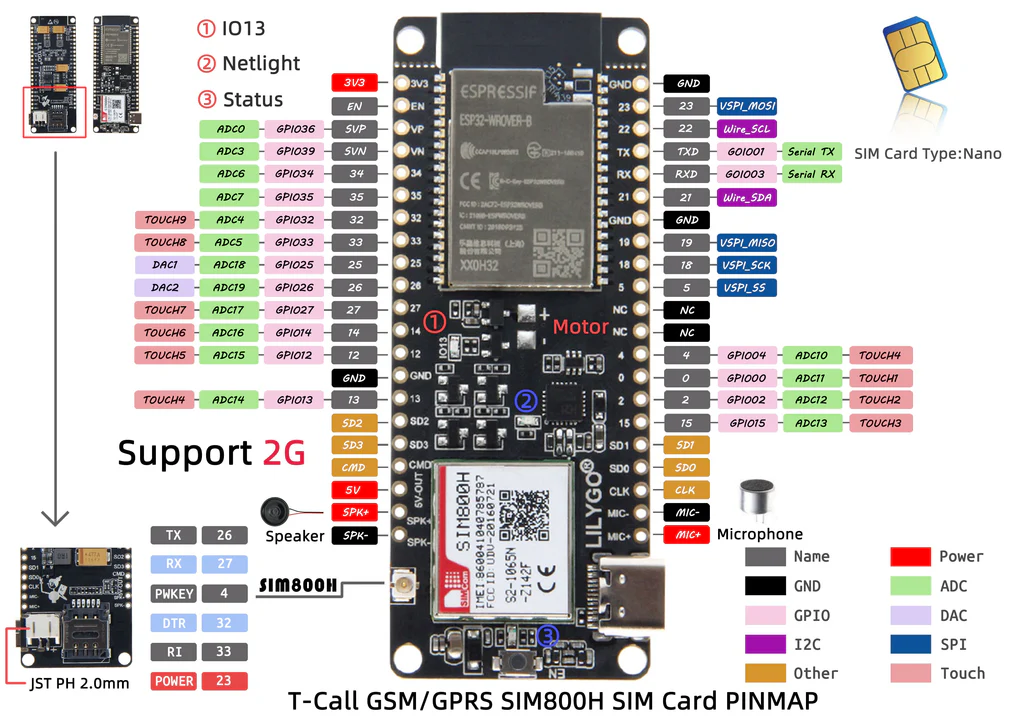
// ESP32 and SIM800l pins
#define MODEM_RST 5
#define MODEM_PWKEY 4
#define MODEM_POWER_ON 23
#define MODEM_TX 27
#define MODEM_RX 26
#define I2C_SDA 21
#define I2C_SCL 22
TinyGsmClient client(modem);
void setup() {
SerialMon.begin(115200);
delay(1000);
pinMode(MODEM_PWKEY, OUTPUT);
pinMode(MODEM_RST, OUTPUT);
pinMode(MODEM_POWER_ON, OUTPUT);
digitalWrite(MODEM_PWKEY, LOW);
digitalWrite(MODEM_RST, HIGH);
digitalWrite(MODEM_POWER_ON, HIGH);
SerialMon.println("Wait ...");
SerialAT.begin(9600, SERIAL_8N1, MODEM_RX, MODEM_TX);
delay(3000);
SerialMon.println("Initializing modem ...");
modem.restart();
String modemInfo = modem.getModemInfo();
SerialMon.print("Modem Info: ");
SerialMon.println(modemInfo);
// Unlock your sim card with a PIN if needed
if (GSM_PIN && modem.getSimStatus() != 3) {
modem.simUnlock(GSM_PIN);
}
SerialMon.print("Waiting for network...");
if (!modem.waitForNetwork(240000L)) {
SerialMon.println(" fail");
delay(10000);
return;
}
SerialMon.println(" success");
if (modem.isNetworkConnected()) {
DBG("Network connected");
}
String ccid = modem.getSimCCID();
DBG("CCID:", ccid);
String imei = modem.getIMEI();
DBG("IMEI:", imei);
String imsi = modem.getIMSI();
DBG("IMSI:", imsi);
String cop = modem.getOperator();
DBG("Operator:", cop);
IPAddress local = modem.localIP();
DBG("Local IP:", local);
// Signal quality (0–31, 99 = not known)
int signalQuality = modem.getSignalQuality();
SerialMon.print("Signal Quality (0-31): ");
SerialMon.println(signalQuality);
}
void loop() {
static unsigned long lastPrint = 0;
if (millis() - lastPrint > 5000) { // every 5 seconds
int signal = modem.getSignalQuality();
SerialMon.print("Signal Quality (0-31): ");
SerialMon.println(signal);
// Optional: Check if still connected
if (!modem.isNetworkConnected()) {
SerialMon.println("Network disconnected!");
} else {
SerialMon.println("Network OK");
}
lastPrint = millis();
}
delay(100);
}Step 4: Uploading the Code to the ESP32
Now that your code is ready and your TinyGSM library is installed, it’s time to flash the script onto your LilyGo T-Call board. If you are new to the ESP32 ecosystem, follow these exact steps in the Arduino IDE:
1. Connect the Hardware: Plug your LilyGo T-Call board into your computer using a data-capable USB Type-C cable. (Make sure it is a data cable, not just a charging cable, or your computer won't recognize the board!).
2. Select the Correct Board:
- Go to the top menu and click Tools > Board > esp32.
- Select ESP32 Dev Module
Step 5: Expected Output (Serial Monitor)
Once you have uploaded the code to your LilyGo T-Call board, you will want to verify that everything is working correctly.
1. Open the Serial Monitor: In your Arduino IDE, click the magnifying glass icon in the top right corner (or go to Tools > Serial Monitor).
2. Set the Baud Rate: Make sure the dropdown menu at the bottom right of the Serial Monitor is set to 115200 baud to match our SerialMon.begin(115200) command in the code.
If your SIM card is active, inserted correctly, and has decent reception, you should see an output that looks very similar to this:
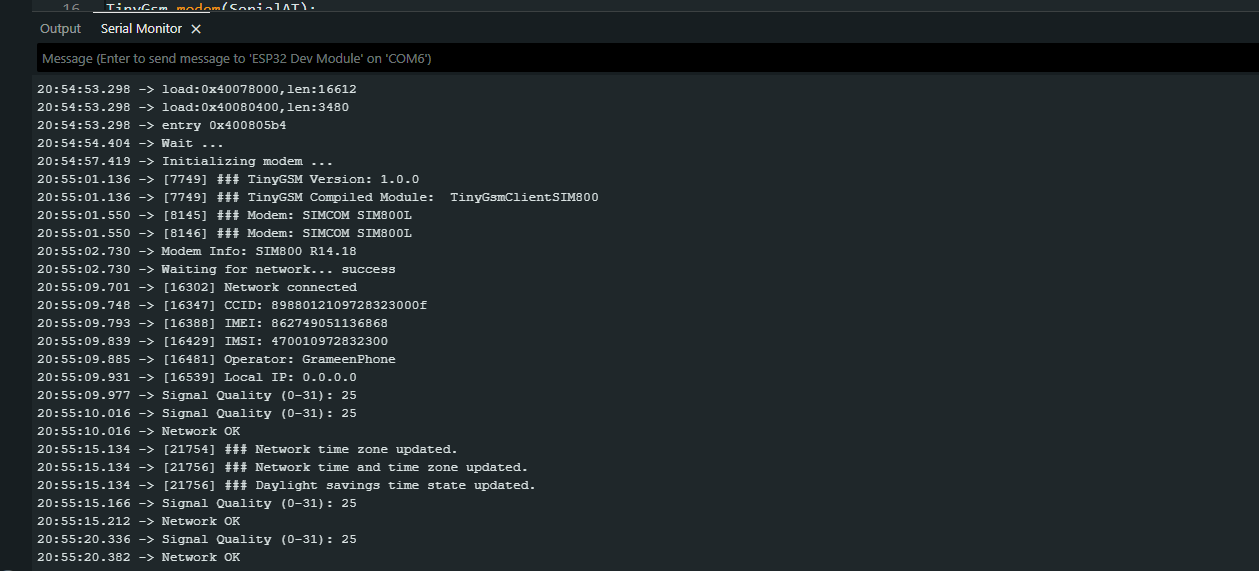
Understanding the Output:
- Modem Info, CCID, IMEI, IMSI: Seeing these numbers means your ESP32 is successfully communicating with the SIM800L chip, and the chip is successfully reading the physical SIM card.
- Operator: This will display your local cellular provider's name (e.g., AT&T, Vodafone, Airtel, etc.).
- Local IP: 0.0.0.0: Don't worry if this says zero! Because we only connected to the cellular network (for calls/SMS) and haven't explicitly opened a GPRS data connection for the internet yet, an IP address won't be assigned. We will cover GPRS internet in the next tutorial.
- Signal Quality (0-31): This is your signal strength. A value of 0 means no signal, 99 means unknown/error, and anything above 10 is generally a stable enough connection for IoT projects. In the example above, 26 is excellent!
- The Loop: You will see the
Signal QualityandNetwork OKMessages print every 5 seconds, confirming your board is maintaining a stable connection without dropping power.
Gemini said
Here is the perfect conclusion section to wrap up your blog post and build excitement for your next tutorial.
Conclusion & What’s Next: Sending SMS!
Congratulations! If you have followed along and seen those success messages in your Serial Monitor, you have officially connected your LilyGo T-Call ESP32 SIM800L to a cellular network.
By reaching this point, you have conquered the biggest hurdle of cellular IoT: achieving a stable, reliable network registration without the frustrating power drops and messy wiring of standalone SIM800L modules. You now have a rock-solid foundation for any cellular project.

But we are just getting started. Now that we have a stable connection, it is time to make this board do some actual work. In our next tutorial, we are going to take things a step further and learn how to send and receive SMS messages directly from the ESP32. Whether you want to build a remote security alert system that texts your phone, or you want to control water pumps and relays via SMS commands, you won't want to miss it!
Make sure you are subscribed to the IoT Bhai YouTube channel and bookmark iotbhai.io so you don't miss Part 2 of this series.
What kind of cellular IoT project are you planning to build with your LilyGo T-Call? Drop a comment below and let me know!