The Ultimate Guide: Headless Raspberry Pi 5 Setup (WiFi, SSH, & VNC)
Don't have a spare monitor? No problem. Learn how to set up your Raspberry Pi 5 completely headless. This step-by-step guide covers flashing the OS, finding your IP address, enabling SSH, and accessing the full desktop via VNC Viewer.
Hey everyone, I hope you are all doing well. I am Tipu, and today we are kicking off a brand new series centered around the powerful new Raspberry Pi 5. I’ve got the 8GB version here, and we are going to do lots of experiments with it.
But first things first: How do you set it up if you don't have an extra monitor, keyboard, or mouse lying around?

This is called a "Headless Setup." In this guide, I will show you step-by-step how to install the Raspberry Pi OS, connect it automatically to your WiFi network, access it using the command line (SSH), and eventually get a full desktop experience using VNC Viewer—all without ever plugging a monitor into the Pi itself.
Let's get started!
Watch the Full Video Tutorial
If you prefer watching the process in action, check out my video guide below:
Prerequisites: What You Need
Before we begin, make sure you have the following items ready. The great thing about this setup is that you don't need an Ethernet cable; we will do everything wirelessly.
- Raspberry Pi 5 Board (4GB or 8GB recommended).
- Power Supply (Ideally the official 27W USB-C PD power supply for the Pi 5).
- Micro SD Card (At least 32GB recommended, Class 10).
- Micro SD Card Reader/Adapter for your computer.
- A Laptop or PC (Windows, Mac, or Linux) connected to the same WiFi network you plan to use for the Pi.
Step 1: Flashing the OS with Pre-Configurations
The secret to an easy headless setup lies in the Raspberry Pi Imager software. It allows us to pre-configure WiFi and SSH settings before the Pi even turns on.
- Download Raspberry Pi Imager: Go to the official Raspberry Pi website and download the Imager for your operating system (I am using Windows). Install and launch it.
- Choose Device: Click "CHOOSE DEVICE" and select Raspberry Pi 5.
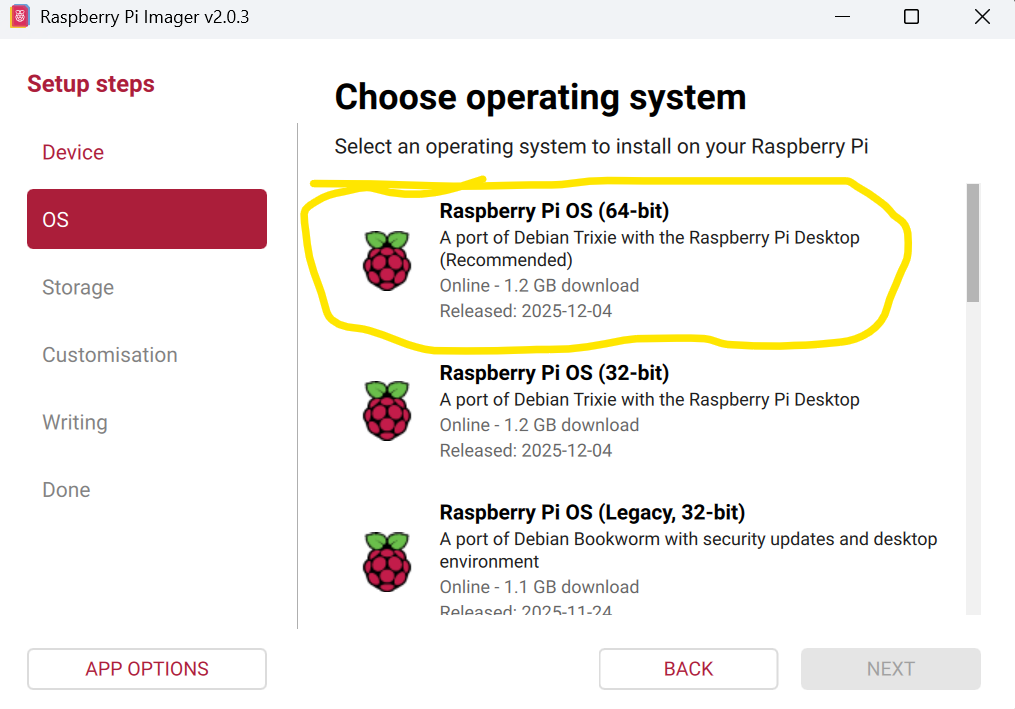
- Choose OS: Click "CHOOSE OS" and select the recommended Raspberry Pi OS (64-bit).
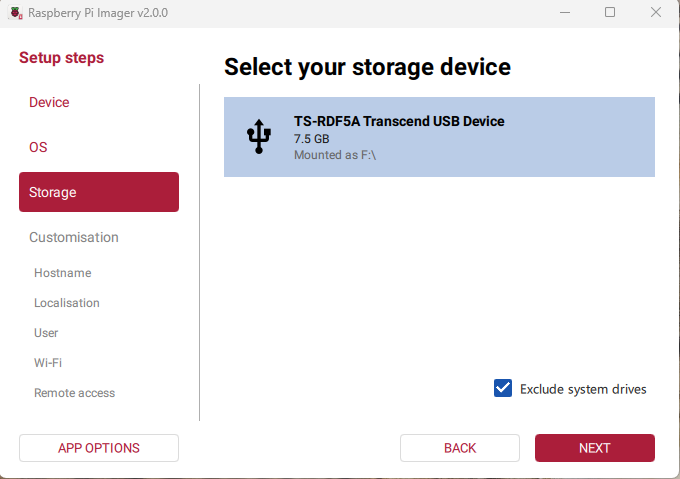
- Choose Storage: Insert your Micro SD card into your computer. Click "CHOOSE STORAGE" and select your SD card.
The Crucial Step: OS Customisation
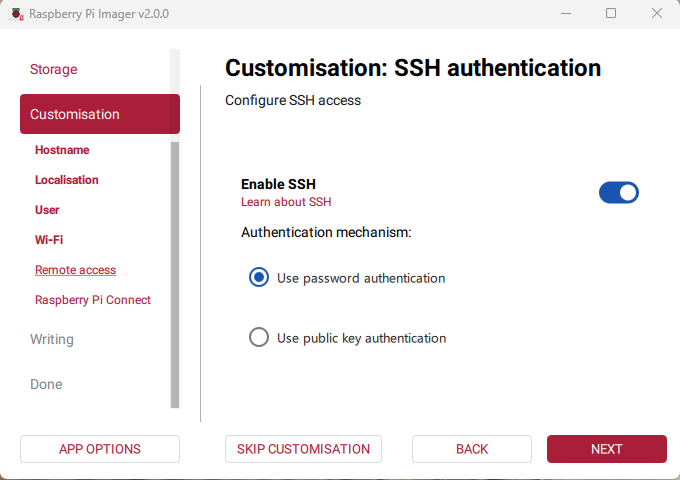
Before you click "WRITE," look for the settings cogwheel icon (or a prompt will appear asking if you want to apply OS customisation settings). Click "Edit Settings."
[INSERT SCREENSHOT: The Raspberry Pi Imager OS Customisation Menu]
Here, you need to configure the following tabs:
- General Tab:
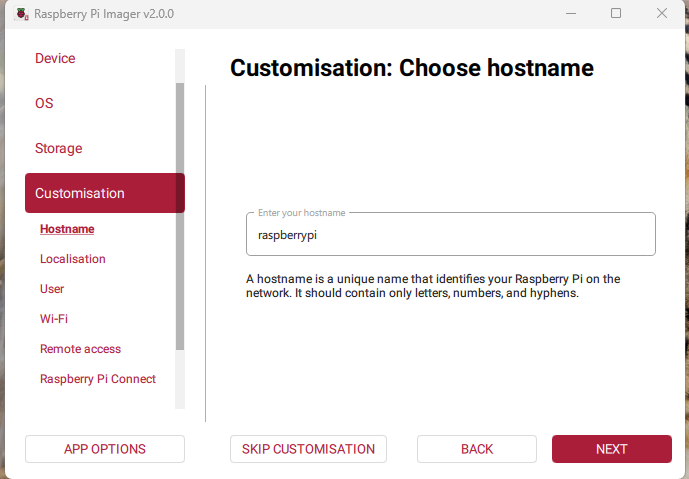
- Set hostname: Give your Pi a name on the network (e.g.,
raspberrypioriotbhai-pi).
- Set hostname: Give your Pi a name on the network (e.g.,
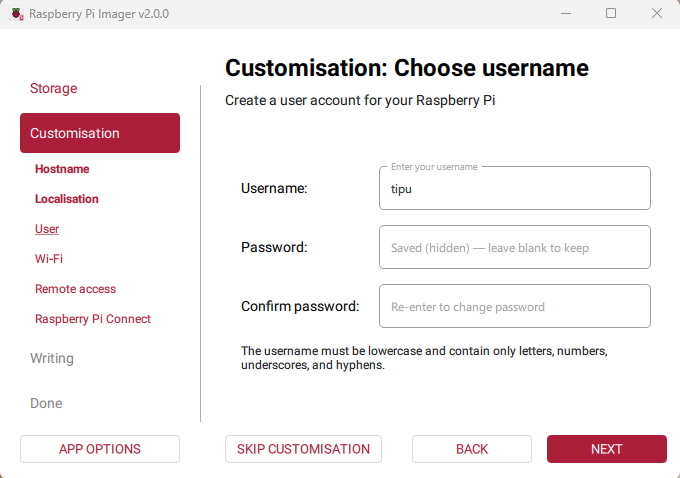
- Set username and password: Create a username (e.g.,
tipu) and a strong password. Do not forget these!
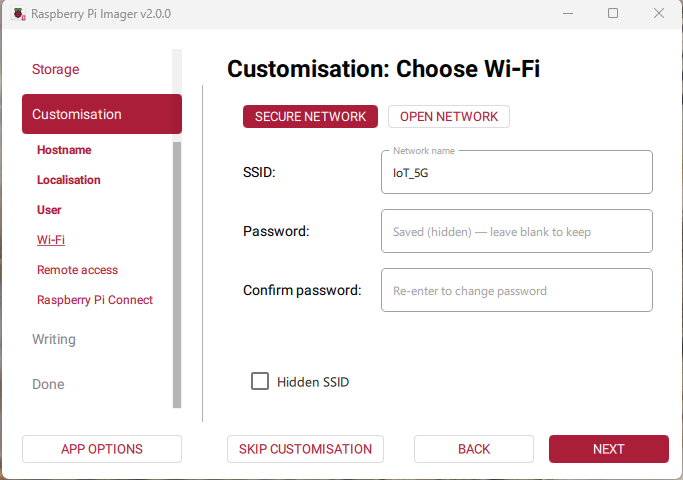
- Configure Wireless LAN: Check this box. Enter your WiFi SSID (network name) and password. Note: Ensure your laptop is connected to this same network right now.
- Set your locale settings (Time zone and Keyboard layout).
- Services Tab:
- Enable SSH: This is vital! Check this box and select "Use password authentication."
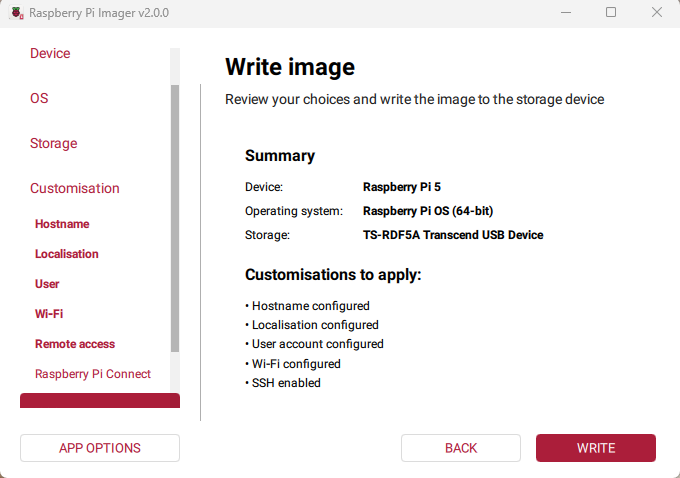
Once configured, click SAVE, then click WRITE. Confirm that you want to erase the SD card. The Imager will now download the OS and write it to the card. This may take a few minutes.
Select "I UNDERSTAND, ERASE AND WRITE"
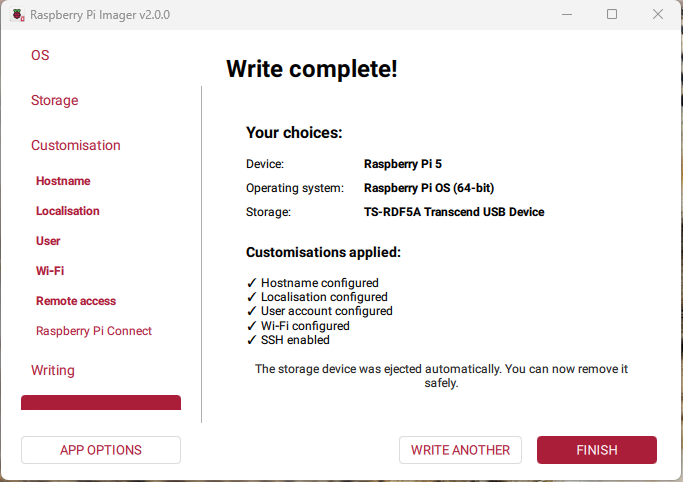
Select FINISH
Step 2: Booting Up the Raspberry Pi 5
- Once the Imager says writing is complete, remove the SD card from your computer.
- Insert the Micro SD card into the slot on the underside of your Raspberry Pi 5.
- Plug in the USB-C power supply.
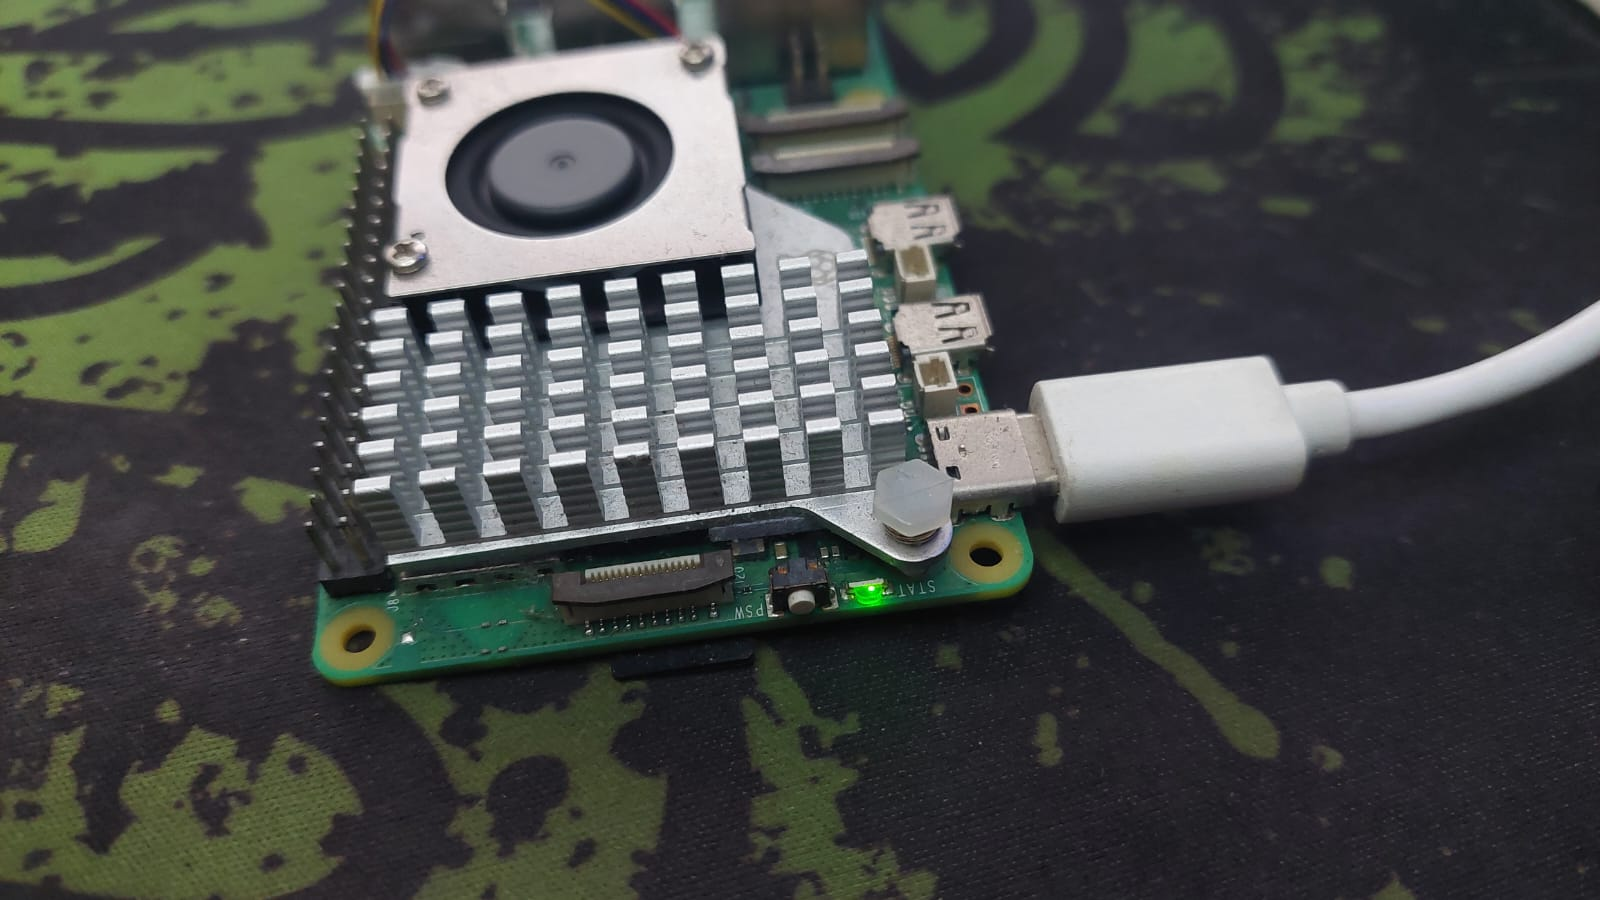
Look at the LEDs: You should see a solid red power LED. Shortly after, you should see a green activity LED start blinking irregularly. This indicates the Pi is reading from the SD card and booting up. Wait about 60-90 seconds for the first boot to complete.
Step 3: Finding the Raspberry Pi's IP Address
Since we don't have a monitor, we need to find the Pi's IP address on our network to connect to it. This is the step where most beginners get stuck, so here are three methods shown in the video:
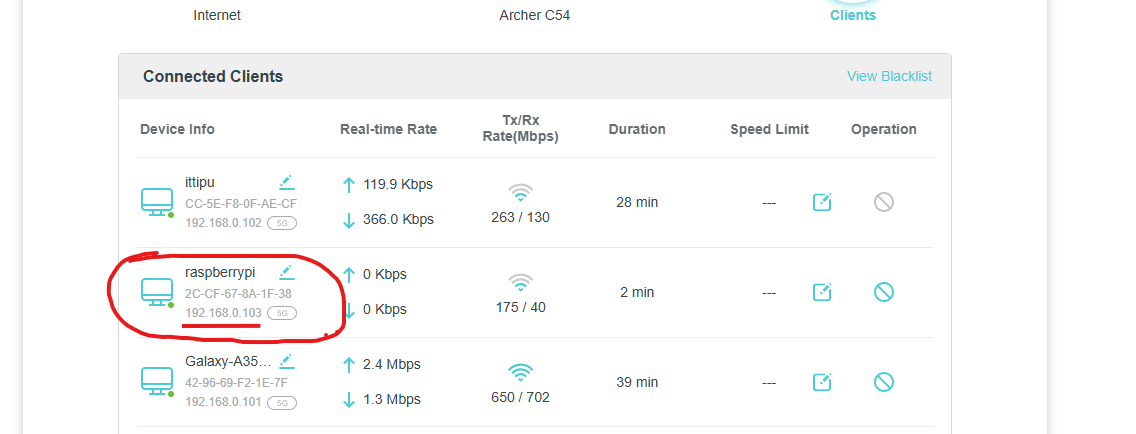
Method A: Check your Router's Admin Page (Easiest)
If you have access to your home router's administration page (usually 192.168.0.1 or 192.168.1.1), log in and look for the "Connected Devices" or "DHCP Client List." Look for a device named raspberrypi (or the hostname you set earlier). Note down the IP address next to it (e.g., 192.168.0.105).
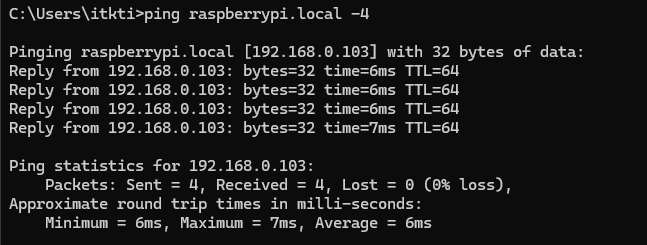
Method B: Ping the Hostname
Open Command Prompt (Windows) or Terminal (Mac/Linux) on your computer. Type the following command using the hostname you set in Step 1:
ping raspberrypi.local
If successful, it might return an IP address.

Note: Sometimes this returns a complex IPv6 address, which can be confusing. If so, try Method C.
Run ping raspberrypi.local -4
Step 4: Connecting via SSH (Command Line)
Now that we have the IP address, let's log into the Pi.
- Open Command Prompt (cmd) on Windows or Terminal on Mac/Linux.
- Type the following command, replacing
usernamewith the user you created andYOUR_PI_IPwith the IP address you found in Step 3:ssh username@YOUR_PI_IP(Example:ssh tipu@192.168.0.105) - Type "yes" if asked to continue connecting.
- Enter the password you created in the Imager.
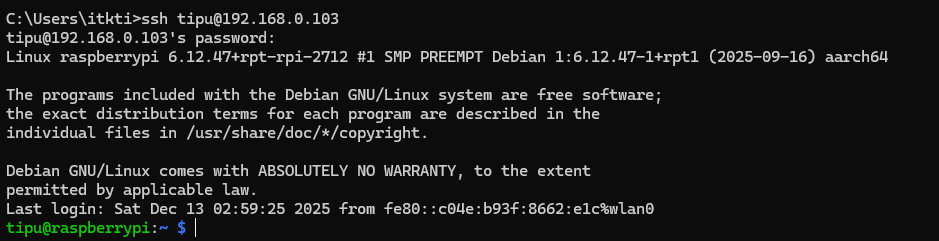
⚠️ IMPORTANT NOTE ON PASSWORDS: When you type your password in the terminal, you will NOT see any characters, stars, or dots appearing on the screen. It will look like nothing is happening. This is a security feature of Linux. Just type your password correctly and press Enter.
Congratulations! You are now inside your Raspberry Pi terminal.
Pro Tip: For Windows users, I highly recommend Bitvise SSH Client. It gives you a terminal and a file transfer window, making it easy to drag and drop files.
Step 5: How to Get a Graphical Desktop (VNC)
SSH is great for text commands, but sometimes you want to see the full Raspberry Pi desktop, open a web browser, or use graphical tools. To do this without a monitor, we use a protocol called VNC (Virtual Network Computing).
We need to do two things:
- Enable the VNC Server on the Raspberry Pi.
- Connect to it using a VNC Viewer on our laptop.
Part A: Enable VNC Server on the Pi
While you are still logged into your SSH terminal from Step 4, type this command:
sudo raspi-config
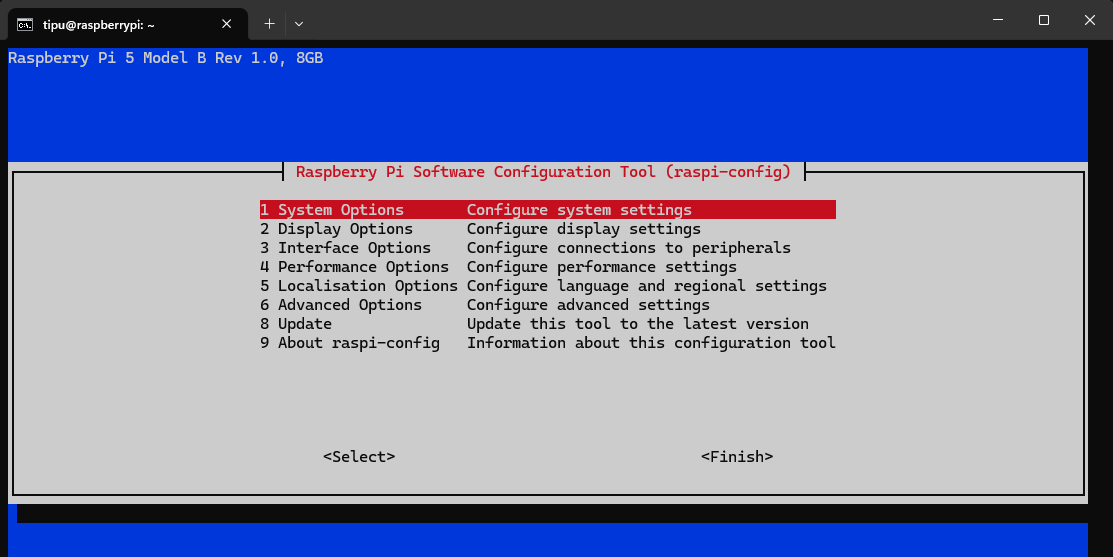
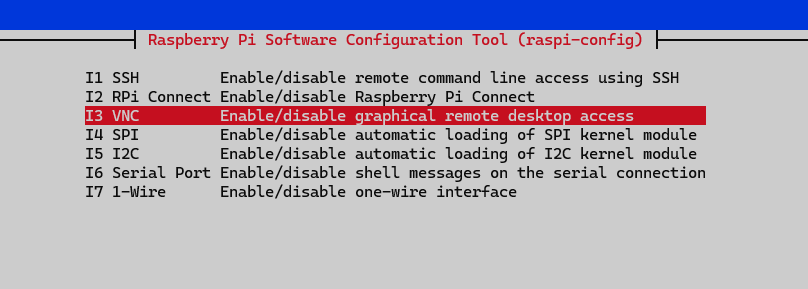
This opens the configuration menu. Use your arrow keys to navigate:
- Select 3 Interface Options and press Enter.
- Select I3 VNC and press Enter.
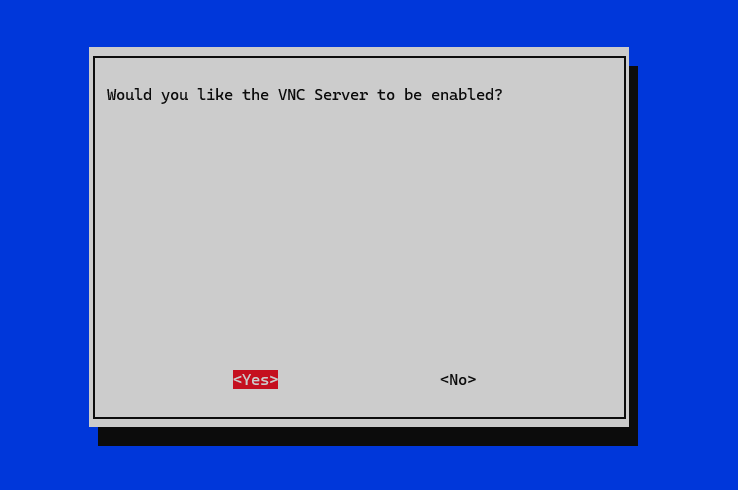
- When asked "Would you like the VNC Server to be enabled?", select <Yes> and press Enter.
- Select <OK>
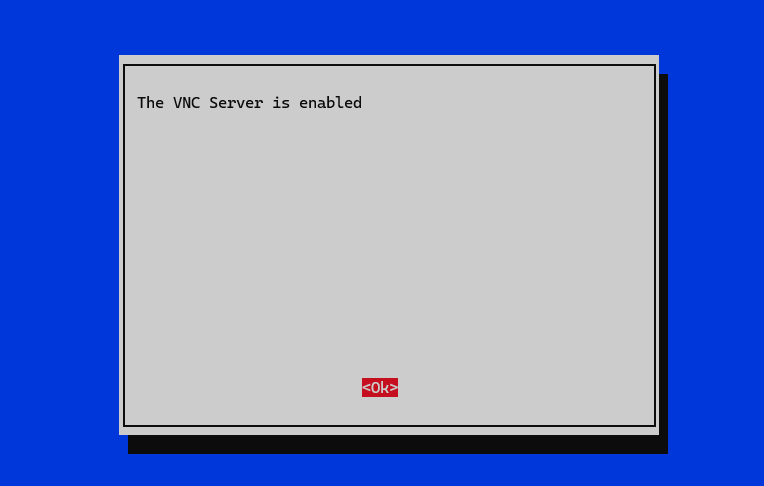
- Select <Finish> to exit the tool.
Part B: Connect using VNC Viewer
Now, go back to your Windows/Mac laptop.
- Download and install RealVNC Viewer (it's free for personal use).
- Open VNC Viewer.
- In the search bar at the top, enter the IP address of your Raspberry Pi (the same one we used for SSH) and press Enter.
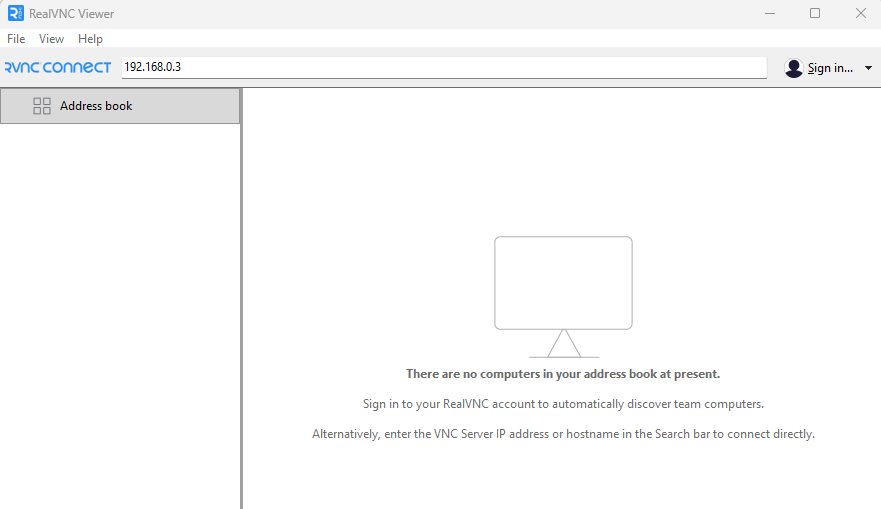
- It will ask for a Username and Password. Enter the credentials you created earlier.
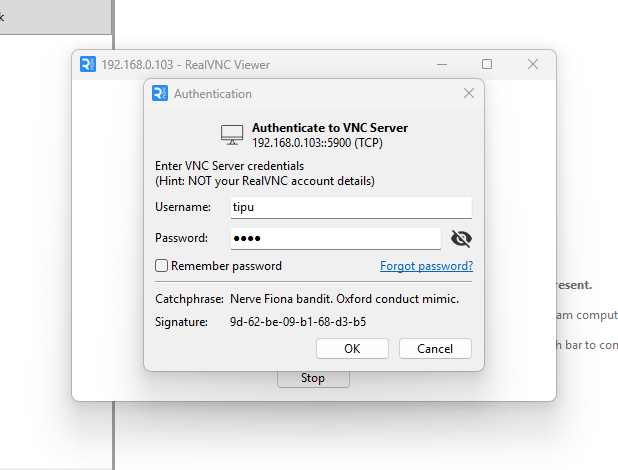
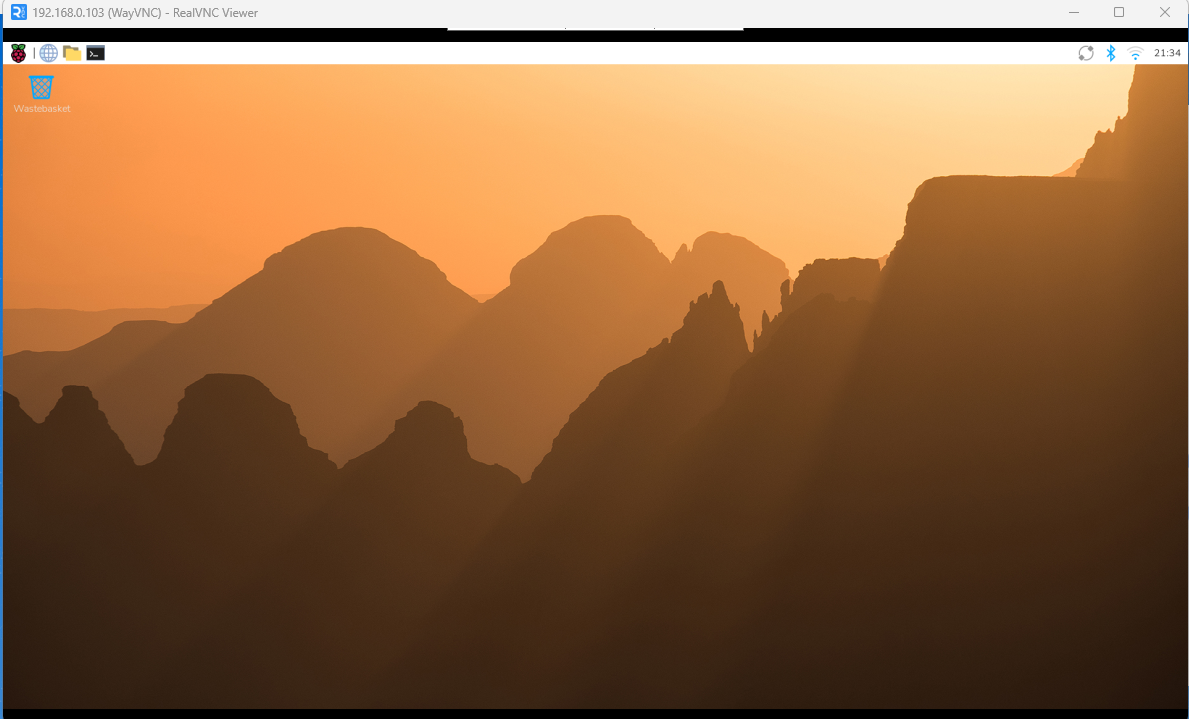
Success! You now have the full Raspberry Pi desktop running in a window on your laptop. You can use your mouse and keyboard just as if the Pi was plugged into a real monitor.
What's Next?
Today, we successfully set up the Raspberry Pi 5 completely headless on the same local network.
But what if your Raspberry Pi is in a remote location on a different network, and you still need to access it? In the next Blog, I will show you how to easily connect to your remote Raspberry Pi from anywhere in the world.
Don't forget to subscribe to IoT Bhai so you don't miss that tutorial! If this guide helped you, please leave a comment below. Thanks for reading!